(I hate to admit it, the rest of the stages that aren't in Beta must hold on for a while until it's come back.) |
No edit summary |
||
| (27 intermediate revisions by 6 users not shown) | |||
| Line 1: | Line 1: | ||
| − | {{About|the areas in the ''Super Smash Flash'' series|the more traditional area with a specific objective|Level}} |
+ | {{About|the areas in the ''Super Smash Flash'' series|the more traditional area with a specific objective|Level|other uses|Stage (disambiguation)}} |
| − | [[File:SSF2 Battlefield.png|250px|thumb| |
+ | [[File:SSF2 Battlefield.png|250px|thumb|[[Battlefield]] is an example of a typical stage in the ''{{S|Super Smash Flash|series}}'' series.]] |
| − | A '''stage''' ({{Mousetext|ステージ|Sutēji}}) is the designated area where [[character]]s fight each other in the |
+ | A '''stage''' ({{Mousetext|ステージ|Sutēji}}) is the designated area where [[character]]s fight each other in the ''{{S|Super Smash Flash|series}}'' series. Each stage has a different layout, size and shape, sometimes including [[Hazard switch|hazards]] that affect the matches in some way, such as lava, water, explosions, etc. The word "stage" usually refers to a [[Group]] stage, but can also refer to the ground or large central platform within this location. Some stages, such as those in the various [[Stadium]] modes, exist for purposes other than fighting. |
== Group stages == |
== Group stages == |
||
[[File:SSF2 - Stage select.png|200px|thumb|The stage select in ''SSF2''.]] |
[[File:SSF2 - Stage select.png|200px|thumb|The stage select in ''SSF2''.]] |
||
| − | In both ''[[Super Smash Flash]]'' and ''[[Super Smash Flash 2]]'', most of the versus mode stages are available from the [[starter stage|start]], while a small number must be [[unlockable stage|unlocked]] by completing certain objectives. Most stages are derived from places in the playable characters' [[universe]]s, and are typically used as those characters' [[home stage]]s. There are some stages with no character representatives such as |
+ | In both ''[[Super Smash Flash]]'' and ''[[Super Smash Flash 2]]'', most of the versus mode stages are available from the [[starter stage|start]], while a small number must be [[unlockable stage|unlocked]] by completing certain objectives. Most stages are derived from places in the playable characters' [[universe]]s, and are typically used as those characters' [[home stage]]s. There are some stages with no character representatives such as Battlefield and [[Final Destination]]. Additionally, not every character has a stage from their own universe. |
Stages range in size from the large ones, such as {{SSF2|Temple}}, to the small ones, such as [[WarioWare, Inc.]] Typically, stages involve a large central [[platform]] with [[ledge]]s and one or more smaller platforms, as well as [[blast line]]s above, below and to the sides of the visible area. Some stages have floors that continue past the edge of the visible area and pass through a side blast line. These floors are known as "walk off edges" or "walk offs", because characters can walk off-screen and die without falling off of an edge first. Stages with walk off edges on both the left and right, like [[Peach's Castle]], are sometimes called "walk off stages". |
Stages range in size from the large ones, such as {{SSF2|Temple}}, to the small ones, such as [[WarioWare, Inc.]] Typically, stages involve a large central [[platform]] with [[ledge]]s and one or more smaller platforms, as well as [[blast line]]s above, below and to the sides of the visible area. Some stages have floors that continue past the edge of the visible area and pass through a side blast line. These floors are known as "walk off edges" or "walk offs", because characters can walk off-screen and die without falling off of an edge first. Stages with walk off edges on both the left and right, like [[Peach's Castle]], are sometimes called "walk off stages". |
||
| − | In ''SSF2'', moving and transforming stages were introduced as this was a technical issue very hard to do in the first ''SSF''. [[Galaxy Tours]] and [[Hylian Skies]], for example, |
+ | In ''SSF2'', moving and transforming stages were introduced as this was a technical issue very hard to do in the first ''SSF''. [[Galaxy Tours]] and [[Hylian Skies]], for example, are transforming stages that change their own layouts to add new stage possibilities. Most of them possess a default layout known as a ''"main hub"'', which the stage returns to after every transformation ends. Notably, [[Silph Co.]] is one of the few that does not, instead cycling through twelve different layouts in sequence. |
Other stage elements include breakable barriers and platforms, such as the wood planks of [[Emerald Cave]] or the sloped floor of [[Green Hill Zone]]; stage hazards and enemies, such as lasers; local items such as [[Distant Planet|pellets]]; and interactive objects such as Barrel Cannons. |
Other stage elements include breakable barriers and platforms, such as the wood planks of [[Emerald Cave]] or the sloped floor of [[Green Hill Zone]]; stage hazards and enemies, such as lasers; local items such as [[Distant Planet|pellets]]; and interactive objects such as Barrel Cannons. |
||
| Line 18: | Line 18: | ||
Most likely because of limitations, the original ''Super Smash Flash'' features only eight versus stages, of which six are starter and two are unlockable (those with shaded cells): |
Most likely because of limitations, the original ''Super Smash Flash'' features only eight versus stages, of which six are starter and two are unlockable (those with shaded cells): |
||
| − | {|class="wikitable |
+ | {|class="wikitable" |
!width="150"|Name |
!width="150"|Name |
||
!width="200"|[[Universe]] |
!width="200"|[[Universe]] |
||
|- |
|- |
||
|align="center" style="background-color: #DCDCDC;"|{{SSF|Battlefield}} |
|align="center" style="background-color: #DCDCDC;"|{{SSF|Battlefield}} |
||
| − | |align="center" |
+ | |align="center"|''{{S|Super Smash Bros.|universe}}'' |
|- |
|- |
||
|align="center"|{{SSF|Dream Land}} |
|align="center"|{{SSF|Dream Land}} |
||
| − | |align="center" |
+ | |align="center"|''{{S|Kirby|universe}}'' |
|- |
|- |
||
|align="center"|[[Emerald Hill Zone]] |
|align="center"|[[Emerald Hill Zone]] |
||
| − | |align="center" |
+ | |align="center"|''{{S|Sonic|universe}}'' |
|- |
|- |
||
|align="center" style="background-color: #DCDCDC;"|{{SSF|Final Destination}} |
|align="center" style="background-color: #DCDCDC;"|{{SSF|Final Destination}} |
||
| − | |align="center" |
+ | |align="center"|''{{S|Super Smash Bros.|universe}}'' |
|- |
|- |
||
|align="center"|{{SSF|Mushroom Kingdom II}} |
|align="center"|{{SSF|Mushroom Kingdom II}} |
||
| − | |align="center" |
+ | |align="center"|''{{S|Mario|universe}}'' |
|- |
|- |
||
|align="center"|[[Peach's Castle]] |
|align="center"|[[Peach's Castle]] |
||
| − | |align="center" |
+ | |align="center"|''{{S|Mario|universe}}'' |
|- |
|- |
||
|align="center"|[[Pokémon Stadium]] |
|align="center"|[[Pokémon Stadium]] |
||
| − | |align="center" |
+ | |align="center"|''{{S|Pokémon|universe}}'' |
|- |
|- |
||
|align="center"|{{SSF|Temple}} |
|align="center"|{{SSF|Temple}} |
||
| − | |align="center" |
+ | |align="center"|''{{S|The Legend of Zelda|universe}}'' |
|} |
|} |
||
=== In ''Super Smash Flash 2'' === |
=== In ''Super Smash Flash 2'' === |
||
| − | Based on the [[Super Smash Flash 2|demo]] versions, |
+ | Based on the [[Super Smash Flash 2 Demo|demo]] versions, 65 stages are confirmed for ''Super Smash Flash 2'' and will be appearing as starter stages, in addition to unlockable stages. Of these stages, 17 are designated as past stages, which are based on stages from the official ''{{S|Super Smash Bros.|universe}}'' series in both name and layout. The currently confirmed stages are as such: |
==== Current stages ==== |
==== Current stages ==== |
||
===== Normal stages ===== |
===== Normal stages ===== |
||
| − | {| |
+ | {|class="wikitable" |
| − | ! |
+ | !width="150"|Name |
| − | ! |
+ | !width="200" colspan="2"|[[Universe]] |
|- |
|- |
||
|align="center"|{{SSF2|Battlefield}} |
|align="center"|{{SSF2|Battlefield}} |
||
| − | |align="center" |
+ | |align="center"|''{{S|Super Smash Bros.|universe}}'' |
|align="center"|{{Symbol|Super Smash Bros.}} |
|align="center"|{{Symbol|Super Smash Bros.}} |
||
|- |
|- |
||
|align="center"|[[Bomb Factory]] |
|align="center"|[[Bomb Factory]] |
||
| − | |align="center" |
+ | |align="center"|''{{S|Bomberman|universe}}'' |
|align="center"|{{Symbol|Bomberman}} |
|align="center"|{{Symbol|Bomberman}} |
||
|- |
|- |
||
|align="center"|[[Bowser's Castle]] |
|align="center"|[[Bowser's Castle]] |
||
| − | |align="center" |
+ | |align="center"|''{{S|Mario|universe}}'' |
|align="center"|{{Symbol|Mario}} |
|align="center"|{{Symbol|Mario}} |
||
|- |
|- |
||
|align="center"|[[Casino Night Zone]] |
|align="center"|[[Casino Night Zone]] |
||
| − | |align="center" |
+ | |align="center"|''{{S|Sonic|universe}}'' |
|align="center"|{{Symbol|Sonic}} |
|align="center"|{{Symbol|Sonic}} |
||
|- |
|- |
||
|align="center"|[[Central Highway]] |
|align="center"|[[Central Highway]] |
||
| − | |align="center" |
+ | |align="center"|''{{S|Mega Man|universe}}'' |
|align="center"|{{Symbol|Mega Man}} |
|align="center"|{{Symbol|Mega Man}} |
||
|- |
|- |
||
|align="center"|[[Chaos Shrine]] |
|align="center"|[[Chaos Shrine]] |
||
| − | |align="center" |
+ | |align="center"|''{{S|FINAL FANTASY|universe}}'' |
|align="center"|{{Symbol|FINAL FANTASY}} |
|align="center"|{{Symbol|FINAL FANTASY}} |
||
|- |
|- |
||
|align="center"|[[Clock Town]] |
|align="center"|[[Clock Town]] |
||
| − | |align="center" |
+ | |align="center"|''{{S|The Legend of Zelda|universe}}'' |
|align="center"|{{Symbol|The Legend of Zelda}} |
|align="center"|{{Symbol|The Legend of Zelda}} |
||
|- |
|- |
||
|align="center"|[[Crateria]] |
|align="center"|[[Crateria]] |
||
| − | |align="center" |
+ | |align="center"|''{{S|Metroid|universe}}'' |
|align="center"|{{Symbol|Metroid}} |
|align="center"|{{Symbol|Metroid}} |
||
|- |
|- |
||
|align="center"|[[Desk]] |
|align="center"|[[Desk]] |
||
| − | |align="center" |
+ | |align="center"|''{{S|Chibi-Robo!|universe}}'' |
|align="center"|{{Symbol|Chibi-Robo!}} |
|align="center"|{{Symbol|Chibi-Robo!}} |
||
|- |
|- |
||
|align="center" style="background-color: #DCDCDC;"|[[Devil's Machine]] |
|align="center" style="background-color: #DCDCDC;"|[[Devil's Machine]] |
||
| − | |align="center" |
+ | |align="center"|''{{S|EarthBound|universe}}'' |
|align="center"|{{Symbol|EarthBound}} |
|align="center"|{{Symbol|EarthBound}} |
||
|- |
|- |
||
|align="center"|[[Dracula's Castle]] |
|align="center"|[[Dracula's Castle]] |
||
| − | |align="center" |
+ | |align="center"|''{{S|Castlevania|universe}}'' |
|align="center"|{{Symbol|Castlevania}} |
|align="center"|{{Symbol|Castlevania}} |
||
|- |
|- |
||
|align="center"|[[Emerald Cave]] |
|align="center"|[[Emerald Cave]] |
||
| − | |align="center" |
+ | |align="center"|''{{S|Wario|universe}}'' |
|align="center"|{{Symbol|Wario}} |
|align="center"|{{Symbol|Wario}} |
||
|- |
|- |
||
|align="center"|{{SSF2|Final Destination}} |
|align="center"|{{SSF2|Final Destination}} |
||
| − | |align="center" |
+ | |align="center"|''{{S|Super Smash Bros.|universe}}'' |
|align="center"|{{Symbol|Super Smash Bros.}} |
|align="center"|{{Symbol|Super Smash Bros.}} |
||
|- |
|- |
||
|align="center" style="background-color: #DCDCDC;"|[[Final Valley]] |
|align="center" style="background-color: #DCDCDC;"|[[Final Valley]] |
||
| − | |align="center" |
+ | |align="center"|''{{S|Naruto|universe}}'' |
|align="center"|{{Symbol|Naruto}} |
|align="center"|{{Symbol|Naruto}} |
||
|- |
|- |
||
| Line 117: | Line 117: | ||
|- |
|- |
||
|align="center"|[[Galaxy Tours]] |
|align="center"|[[Galaxy Tours]] |
||
| ⚫ | |||
| − | {{r|ref1}} |
||
| ⚫ | |||
|align="center"|{{Symbol|Mario}} |
|align="center"|{{Symbol|Mario}} |
||
|- |
|- |
||
|align="center"|[[Gangplank Galleon]] |
|align="center"|[[Gangplank Galleon]] |
||
| − | |align="center" |
+ | |align="center"|''{{S|Donkey Kong|universe}}'' |
|align="center"|{{Symbol|Donkey Kong}} |
|align="center"|{{Symbol|Donkey Kong}} |
||
|- |
|- |
||
|align="center"|[[Hidden Leaf Village]] |
|align="center"|[[Hidden Leaf Village]] |
||
| − | |align="center" |
+ | |align="center"|''{{S|Naruto|universe}}'' |
|align="center"|{{Symbol|Naruto}} |
|align="center"|{{Symbol|Naruto}} |
||
|- |
|- |
||
|align="center"|[[Hueco Mundo]] |
|align="center"|[[Hueco Mundo]] |
||
| − | |align="center" |
+ | |align="center"|''{{S|Bleach|universe}}'' |
|align="center"|{{Symbol|Bleach}} |
|align="center"|{{Symbol|Bleach}} |
||
|- |
|- |
||
|align="center"|[[Hylian Skies]] |
|align="center"|[[Hylian Skies]] |
||
| − | |align="center" |
+ | |align="center"|''{{S|The Legend of Zelda|universe}}'' |
|align="center"|{{Symbol|The Legend of Zelda}} |
|align="center"|{{Symbol|The Legend of Zelda}} |
||
|- |
|- |
||
|align="center"|[[Jungle Hijinx]] |
|align="center"|[[Jungle Hijinx]] |
||
| − | |align="center" |
+ | |align="center"|''{{S|Donkey Kong|universe}}'' |
|align="center"|{{Symbol|Donkey Kong}} |
|align="center"|{{Symbol|Donkey Kong}} |
||
| ⚫ | |||
| + | |align="center" style="background-color: #DCDCDC;"|[[Krazoa Palace]] |
||
| ⚫ | |||
| + | |align="center"|{{Symbol|Star Fox}} |
||
|- |
|- |
||
|align="center"|[[Lake of Rage]] |
|align="center"|[[Lake of Rage]] |
||
| − | |align="center" |
+ | |align="center"|''{{S|Pokémon|universe}}'' |
|align="center"|{{Symbol|Pokémon}} |
|align="center"|{{Symbol|Pokémon}} |
||
|- |
|- |
||
|align="center"|[[Lunar Core]] |
|align="center"|[[Lunar Core]] |
||
| − | |align="center" |
+ | |align="center"|''{{S|FINAL FANTASY|universe}}'' |
|align="center"|{{Symbol|FINAL FANTASY}} |
|align="center"|{{Symbol|FINAL FANTASY}} |
||
|- |
|- |
||
|align="center"|[[Meteo Campaigns]] |
|align="center"|[[Meteo Campaigns]] |
||
| − | |align="center" |
+ | |align="center"|''{{S|Star Fox|universe}}'' |
|align="center"|{{Symbol|Star Fox}} |
|align="center"|{{Symbol|Star Fox}} |
||
|- |
|- |
||
|align="center"|[[Mushroom Kingdom III]] |
|align="center"|[[Mushroom Kingdom III]] |
||
| − | |align="center" |
+ | |align="center"|''{{S|Mario|universe}}'' |
|align="center"|{{Symbol|Mario}} |
|align="center"|{{Symbol|Mario}} |
||
|- |
|- |
||
|align="center"|[[Nintendo 3DS]] |
|align="center"|[[Nintendo 3DS]] |
||
| − | |align="center" |
+ | |align="center"|''{{S|Nintendo 3DS|universe}}'' |
|align="center"|{{Symbol|Nintendo 3DS}} |
|align="center"|{{Symbol|Nintendo 3DS}} |
||
|- |
|- |
||
|align="center"|[[PAC-MAZE]] |
|align="center"|[[PAC-MAZE]] |
||
| − | |align="center" |
+ | |align="center"|''{{S|PAC-MAN|universe}}'' |
|align="center"|{{Symbol|PAC-MAN}} |
|align="center"|{{Symbol|PAC-MAN}} |
||
|- |
|- |
||
|align="center"|[[Palutena's Shrine]] |
|align="center"|[[Palutena's Shrine]] |
||
| − | |align="center" |
+ | |align="center"|''{{S|Kid Icarus|universe}}'' |
|align="center"|{{Symbol|Kid Icarus}} |
|align="center"|{{Symbol|Kid Icarus}} |
||
|- |
|- |
||
|align="center"|[[Phase 8]] |
|align="center"|[[Phase 8]] |
||
| − | |align="center" |
+ | |align="center"|''{{S|Metroid|universe}}'' |
|align="center"|{{Symbol|Metroid}} |
|align="center"|{{Symbol|Metroid}} |
||
|- |
|- |
||
|align="center"|[[Planet Namek]] |
|align="center"|[[Planet Namek]] |
||
| − | |align="center" |
+ | |align="center"|''{{S|Dragon Ball|universe}}'' |
|align="center"|{{Symbol|Dragon Ball}} |
|align="center"|{{Symbol|Dragon Ball}} |
||
|- |
|- |
||
|align="center"|[[Pokémon Colosseum]] |
|align="center"|[[Pokémon Colosseum]] |
||
| − | |align="center" |
+ | |align="center"|''{{S|Pokémon|universe}}'' |
|align="center"|{{Symbol|Pokémon}} |
|align="center"|{{Symbol|Pokémon}} |
||
| ⚫ | |||
| ⚫ | |||
| + | |align="center"|''{{S|Super Smash Flash 2|universe}}'' |
||
| + | |align="center"|{{Symbol|Super Smash Flash 2}} |
||
|- |
|- |
||
|align="center"|[[Rainbow Route]] |
|align="center"|[[Rainbow Route]] |
||
| − | |align="center" |
+ | |align="center"|''{{S|Kirby|universe}}'' |
|align="center"|{{Symbol|Kirby}} |
|align="center"|{{Symbol|Kirby}} |
||
|- |
|- |
||
|align="center"|[[Sand Ocean]] |
|align="center"|[[Sand Ocean]] |
||
| − | |align="center" |
+ | |align="center"|''{{S|F-Zero|universe}}'' |
|align="center"|{{Symbol|F-Zero}} |
|align="center"|{{Symbol|F-Zero}} |
||
|- |
|- |
||
|align="center"|[[Saturn Valley]] |
|align="center"|[[Saturn Valley]] |
||
| − | |align="center" |
+ | |align="center"|''{{S|EarthBound|universe}}'' |
|align="center"|{{Symbol|EarthBound}} |
|align="center"|{{Symbol|EarthBound}} |
||
|- |
|- |
||
|align="center"|[[Skull Fortress]] |
|align="center"|[[Skull Fortress]] |
||
| − | |align="center" |
+ | |align="center"|''{{S|Mega Man|universe}}'' |
|align="center"|{{Symbol|Mega Man}} |
|align="center"|{{Symbol|Mega Man}} |
||
| + | |- |
||
| + | |align="center" style="background-color: #DCDCDC;"|[[Sky Pillar]] |
||
| + | |align="center"|''{{S|Pokémon|universe}}'' |
||
| ⚫ | |||
|- |
|- |
||
|align="center"|[[Sky Sanctuary Zone]] |
|align="center"|[[Sky Sanctuary Zone]] |
||
| − | |align="center" |
+ | |align="center"|''{{S|Sonic|universe}}'' |
|align="center"|{{Symbol|Sonic}} |
|align="center"|{{Symbol|Sonic}} |
||
|- |
|- |
||
|align="center" style="background-color: #DCDCDC;"|[[Steel Diver]] |
|align="center" style="background-color: #DCDCDC;"|[[Steel Diver]] |
||
| − | |align="center" |
+ | |align="center"|''{{S|Steel Diver|universe}}'' |
|align="center"|{{Symbol|Steel Diver}} |
|align="center"|{{Symbol|Steel Diver}} |
||
| + | |- |
||
| + | |align="center"|[[Suzaku Castle]] |
||
| + | |align="center"|''{{S|Street Fighter|universe}}'' |
||
| + | |align="center"|{{Symbol|Street Fighter}} |
||
| + | |- |
||
| + | |align="center" style="background-color: #DCDCDC;"|[[The World That Never Was]] |
||
| + | |align="center"|''{{S|KINGDOM HEARTS|universe}}'' |
||
| + | |align="center"|{{Symbol|KINGDOM HEARTS}} |
||
| + | |- |
||
| + | |align="center"|[[Thousand Sunny]] |
||
| + | |align="center"|''{{S|One Piece|universe}}'' |
||
| + | |align="center"|{{Symbol|One Piece}} |
||
|- |
|- |
||
|align="center"|[[Tower of Salvation]] |
|align="center"|[[Tower of Salvation]] |
||
| − | |align="center" |
+ | |align="center"|''{{S|Tales|universe}}'' |
|align="center"|{{Symbol|Tales}} |
|align="center"|{{Symbol|Tales}} |
||
|- |
|- |
||
|align="center"|[[Twilight Town]] |
|align="center"|[[Twilight Town]] |
||
| − | |align="center" |
+ | |align="center"|''{{S|KINGDOM HEARTS|universe}}'' |
|align="center"|{{Symbol|KINGDOM HEARTS}} |
|align="center"|{{Symbol|KINGDOM HEARTS}} |
||
|- |
|- |
||
|align="center"|[[Venus Lighthouse]] |
|align="center"|[[Venus Lighthouse]] |
||
| − | |align="center" |
+ | |align="center"|''{{S|Golden Sun|universe}}'' |
|align="center"|{{Symbol|Golden Sun}} |
|align="center"|{{Symbol|Golden Sun}} |
||
|- |
|- |
||
|align="center" style="background-color: #DCDCDC;"|[[Waiting Room]] |
|align="center" style="background-color: #DCDCDC;"|[[Waiting Room]] |
||
| − | |align="center" |
+ | |align="center"|''{{S|Super Smash Bros.|universe}}'' |
|align="center"|{{Symbol|Super Smash Bros.}} |
|align="center"|{{Symbol|Super Smash Bros.}} |
||
|- |
|- |
||
|align="center"|[[WarioWare, Inc.]] |
|align="center"|[[WarioWare, Inc.]] |
||
| − | |align="center" |
+ | |align="center"|''{{S|Wario|universe}}'' |
|align="center"|{{Symbol|Wario}} |
|align="center"|{{Symbol|Wario}} |
||
|- |
|- |
||
|align="center" style="background-color: #DCDCDC;"|[[World Tournament]] |
|align="center" style="background-color: #DCDCDC;"|[[World Tournament]] |
||
| − | |align="center" |
+ | |align="center"|''{{S|Dragon Ball|universe}}'' |
|align="center"|{{Symbol|Dragon Ball}} |
|align="center"|{{Symbol|Dragon Ball}} |
||
|- |
|- |
||
|align="center"|[[Yoshi's Island]] |
|align="center"|[[Yoshi's Island]] |
||
| − | |align="center" |
+ | |align="center"|''{{S|Yoshi|universe}}'' |
|align="center"|{{Symbol|Yoshi}} |
|align="center"|{{Symbol|Yoshi}} |
||
|} |
|} |
||
| − | |||
| − | {{reflist|refs= |
||
| − | <ref name=ref1>{{Font|80|Includes [[Starship Mario]], [[Toy Time Galaxy]], [[Good Egg Galaxy]], and [[Freezeflame Galaxy]].}}</ref> |
||
| − | }} |
||
===== Past stages ===== |
===== Past stages ===== |
||
| − | {| |
+ | {|class="wikitable" |
| − | ! |
+ | !width="150"|Name |
| − | ! |
+ | !width="200" colspan="2"|[[Universe]] |
|- |
|- |
||
|align="center"|[[Castle Siege]] |
|align="center"|[[Castle Siege]] |
||
| − | |align="center" |
+ | |align="center"|''{{S|Fire Emblem|universe}}'' |
|align="center"|{{Symbol|Fire Emblem}} |
|align="center"|{{Symbol|Fire Emblem}} |
||
|- |
|- |
||
|align="center"|{{SSF2|Dream Land}} |
|align="center"|{{SSF2|Dream Land}} |
||
| − | |align="center" |
+ | |align="center"|''{{S|Kirby|universe}}'' |
|align="center"|{{Symbol|Kirby}} |
|align="center"|{{Symbol|Kirby}} |
||
|- |
|- |
||
|align="center"|[[Fourside]] |
|align="center"|[[Fourside]] |
||
| − | |align="center" |
+ | |align="center"|''{{S|EarthBound|universe}}'' |
|align="center"|{{Symbol|EarthBound}} |
|align="center"|{{Symbol|EarthBound}} |
||
|- |
|- |
||
|align="center"|[[Green Hill Zone]] |
|align="center"|[[Green Hill Zone]] |
||
| − | |align="center" |
+ | |align="center"|''{{S|Sonic|universe}}'' |
|align="center"|{{Symbol|Sonic}} |
|align="center"|{{Symbol|Sonic}} |
||
|- |
|- |
||
|align="center" style="background-color: #DCDCDC;"|[[Hyrule Castle]] |
|align="center" style="background-color: #DCDCDC;"|[[Hyrule Castle]] |
||
| − | |align="center" |
+ | |align="center"|''{{S|The Legend of Zelda|universe}}'' |
|align="center"|{{Symbol|The Legend of Zelda}} |
|align="center"|{{Symbol|The Legend of Zelda}} |
||
|- |
|- |
||
| − | |align="center" style="background-color: #DCDCDC;"|[[ |
+ | |align="center" style="background-color: #DCDCDC;"|[[Meta Crystal]] |
| − | |align="center" |
+ | |align="center"|''{{S|Super Smash Bros.|universe}}'' |
|align="center"|{{Symbol|Super Smash Bros.}} |
|align="center"|{{Symbol|Super Smash Bros.}} |
||
|- |
|- |
||
| − | |align="center" style="background-color: #DCDCDC;"| |
+ | |align="center" style="background-color: #DCDCDC;"|{{S|Mushroom Kingdom|stage}} |
| − | |align="center" |
+ | |align="center"|''{{S|Mario|universe}}'' |
|align="center"|{{Symbol|Mario}} |
|align="center"|{{Symbol|Mario}} |
||
|- |
|- |
||
|align="center"|{{SSF2|Mushroom Kingdom II}} |
|align="center"|{{SSF2|Mushroom Kingdom II}} |
||
| − | |align="center" |
+ | |align="center"|''{{S|Mario|universe}}'' |
|align="center"|{{Symbol|Mario}} |
|align="center"|{{Symbol|Mario}} |
||
|- |
|- |
||
|align="center"|[[Princess Peach's Castle]] |
|align="center"|[[Princess Peach's Castle]] |
||
| − | |align="center" |
+ | |align="center"|''{{S|Mario|universe}}'' |
|align="center"|{{Symbol|Mario}} |
|align="center"|{{Symbol|Mario}} |
||
|- |
|- |
||
|align="center" style="background-color: #DCDCDC;"|[[Saffron City]] |
|align="center" style="background-color: #DCDCDC;"|[[Saffron City]] |
||
| − | |align="center" |
+ | |align="center"|''{{S|Pokémon|universe}}'' |
|align="center"|{{Symbol|Pokémon}} |
|align="center"|{{Symbol|Pokémon}} |
||
|- |
|- |
||
|align="center"|[[Sector Z]] |
|align="center"|[[Sector Z]] |
||
| − | |align="center" |
+ | |align="center"|''{{S|Star Fox|universe}}'' |
|align="center"|{{Symbol|Star Fox}} |
|align="center"|{{Symbol|Star Fox}} |
||
|- |
|- |
||
|align="center"|[[Smashville]] |
|align="center"|[[Smashville]] |
||
| − | |align="center" |
+ | |align="center"|''{{S|Animal Crossing|universe}}'' |
|align="center"|{{Symbol|Animal Crossing}} |
|align="center"|{{Symbol|Animal Crossing}} |
||
|- |
|- |
||
|align="center"|{{SSF2|Temple}} |
|align="center"|{{SSF2|Temple}} |
||
| − | |align="center" |
+ | |align="center"|''{{S|The Legend of Zelda|universe}}'' |
|align="center"|{{Symbol|The Legend of Zelda}} |
|align="center"|{{Symbol|The Legend of Zelda}} |
||
|- |
|- |
||
|align="center"|[[Yoshi's Island (64)]] |
|align="center"|[[Yoshi's Island (64)]] |
||
| − | |align="center" |
+ | |align="center"|''{{S|Yoshi|universe}}'' |
|align="center"|{{Symbol|Yoshi}} |
|align="center"|{{Symbol|Yoshi}} |
||
|- |
|- |
||
|align="center"|[[Yoshi's Story]] |
|align="center"|[[Yoshi's Story]] |
||
| − | |align="center" |
+ | |align="center"|''{{S|Yoshi|universe}}'' |
|align="center"|{{Symbol|Yoshi}} |
|align="center"|{{Symbol|Yoshi}} |
||
|} |
|} |
||
| − | ==== |
+ | ==== Disabled stages ==== |
| + | {{Unconfirmed|section=yes}} |
||
| ⚫ | |||
| + | |||
| ⚫ | |||
| ⚫ | |||
| ⚫ | |||
| ⚫ | |||
| ⚫ | |||
|- |
|- |
||
|align="center"|[[Distant Planet]] |
|align="center"|[[Distant Planet]] |
||
| − | |align="center" |
+ | |align="center"|''{{S|Pikmin|universe}}'' |
|align="center"|{{Symbol|Pikmin}} |
|align="center"|{{Symbol|Pikmin}} |
||
| + | |- |
||
| + | |align="center"|[[Shadow Moses Island]] |
||
| ⚫ | |||
| + | |align="center"|{{Symbol|Metal Gear}} |
||
|- |
|- |
||
|align="center"|[[Silph Co.]] |
|align="center"|[[Silph Co.]] |
||
| − | |align="center" |
+ | |align="center"|''{{S|Pokémon|universe}}'' |
|align="center"|{{Symbol|Pokémon}} |
|align="center"|{{Symbol|Pokémon}} |
||
|- |
|- |
||
|align="center"|[[Skyward Voyage]] |
|align="center"|[[Skyward Voyage]] |
||
| − | |align="center" |
+ | |align="center"|''{{S|The Legend of Zelda|universe}}'' |
|align="center"|{{Symbol|The Legend of Zelda}} |
|align="center"|{{Symbol|The Legend of Zelda}} |
||
| ⚫ | |||
| ⚫ | |||
| ⚫ | |||
| ⚫ | |||
|} |
|} |
||
==== Leaked stages ==== |
==== Leaked stages ==== |
||
| − | {{Leaked}} |
+ | {{Leaked|section=yes}} |
| + | |||
| − | {|class="wikitable |
+ | {|class="wikitable" |
!width="150"|Name |
!width="150"|Name |
||
!width="200" colspan="2"|[[Universe]] |
!width="200" colspan="2"|[[Universe]] |
||
|- |
|- |
||
|align="center"|[[Butter Building]] |
|align="center"|[[Butter Building]] |
||
| − | |align="center" |
+ | |align="center"|''{{S|Kirby|universe}}'' |
|align="center"|{{Symbol|Kirby}} |
|align="center"|{{Symbol|Kirby}} |
||
| + | |- |
||
| + | |align="center"|[[Castle Daein]] |
||
| + | |align="center"|''{{S|Fire Emblem|universe}}'' |
||
| + | |align="center"|{{Symbol|Fire Emblem}} |
||
|- |
|- |
||
|align="center"|[[Ice Climbers]] |
|align="center"|[[Ice Climbers]] |
||
| Line 340: | Line 366: | ||
|- |
|- |
||
|align="center"|[[Skyworld]] |
|align="center"|[[Skyworld]] |
||
| − | |align="center" |
+ | |align="center"|''{{S|Kid Icarus|universe}}'' |
|align="center"|{{Symbol|Kid Icarus}} |
|align="center"|{{Symbol|Kid Icarus}} |
||
| + | |- |
||
| ⚫ | |||
| + | |align="center"|''{{S|The Legend of Zelda|universe}}'' |
||
| + | |align="center"|{{Symbol|The Legend of Zelda}} |
||
|} |
|} |
||
==== Removed stages ==== |
==== Removed stages ==== |
||
| − | {{Unused}} |
+ | {{Unused|section=yes}} |
| + | |||
| − | {|class="wikitable |
+ | {|class="wikitable" |
!width="150"|Name |
!width="150"|Name |
||
!width="200" colspan="2"|[[Universe]] |
!width="200" colspan="2"|[[Universe]] |
||
|- |
|- |
||
|align="center"|[[Castle Wily]] |
|align="center"|[[Castle Wily]] |
||
| − | |align="center" |
+ | |align="center"|''{{S|Mega Man|universe}}'' |
|align="center"|{{Symbol|Mega Man}} |
|align="center"|{{Symbol|Mega Man}} |
||
| ⚫ | |||
| ⚫ | |||
| ⚫ | |||
| ⚫ | |||
|- |
|- |
||
|align="center"|[[Temple of Time]] |
|align="center"|[[Temple of Time]] |
||
| − | |align="center" |
+ | |align="center"|''{{S|The Legend of Zelda|universe}}'' |
|align="center"|{{Symbol|The Legend of Zelda}} |
|align="center"|{{Symbol|The Legend of Zelda}} |
||
|- |
|- |
||
|align="center"|[[Test Stage 1]] |
|align="center"|[[Test Stage 1]] |
||
| − | |align="center" |
+ | |align="center"|''{{S|Super Smash Bros.|universe}}'' |
| + | |align="center"|{{Symbol|Super Smash Bros.}} |
||
|- |
|- |
||
|align="center"|[[Test Stage 2]] |
|align="center"|[[Test Stage 2]] |
||
| − | |align="center" |
+ | |align="center"|''{{S|Super Smash Bros.|universe}}'' |
| + | |align="center"|{{Symbol|Super Smash Bros.}} |
||
|} |
|} |
||
| Line 381: | Line 410: | ||
|- |
|- |
||
|align="center"|[[Kirby Hub Room]] |
|align="center"|[[Kirby Hub Room]] |
||
| − | |align="center" |
+ | |align="center"|''{{S|Kirby|universe}}'' |
| − | | |
+ | |The stage used for every characters' [[Target Smash#In Super Smash Flash|Target Test]] layouts. It consists of many cloud platforms and is used . The target layouts are different for each character and are typically positioned in a way that is tailored towards each character's abilities. |
|- |
|- |
||
| − | |align="center"| |
+ | |align="center"|{{S|Emerald Hill Zone|Race to the Finish}} |
| − | |align="center" |
+ | |align="center"|''{{S|Sonic|universe}}'' |
| − | |A longer version of the VS. Mode stage of the same name. There are two versions, a horizontally oriented one for [[Classic]], and a more difficult, vertically oriented one for [[Adventure]]. |
+ | |A longer version of the VS. Mode stage of the same name. There are two versions, a horizontally oriented one for [[Classic#In Super Smash Flash|Classic]], and a more difficult, vertically oriented one for [[Adventure#In Super Smash Flash|Adventure]]. |
|- |
|- |
||
|align="center"|[[Floating Islands]] |
|align="center"|[[Floating Islands]] |
||
| − | |align="center" |
+ | |align="center"|''{{S|Super Smash Bros.|universe}}'' |
| − | |An infamous level comprised of various platforms that have to be escalated by the player as |
+ | |An infamous level comprised of various platforms that have to be escalated by the player as they avoids swarms of enemies. |
|- |
|- |
||
| − | |align="center"|[[All-Star Rest Area]] |
+ | |align="center"|[[All-Star Rest Area#In Super Smash Flash|All-Star Rest Area]] |
| − | |align="center" |
+ | |align="center"|''{{S|Super Smash Bros.|universe}}'' |
| + | |The stage used between each match in [[All-Star#In Super Smash Flash|All-Star]]. It consists of a single platform similar to the one used for the top platform in Floating Islands. |
||
| − | |A single platform similarly-looking to the Floating Islands that appears in [[All-Star]] to prepare the player of his/her next match. |
||
|- |
|- |
||
|align="center"|[[Super Mario World]] |
|align="center"|[[Super Mario World]] |
||
| − | |align="center" |
+ | |align="center"|''{{S|Mario|universe}}'' |
|The first level in Adventure mode, a replica of the level ''Yoshi's Island 2'' from the [[Super Mario World (video game)|game of the same name]]. |
|The first level in Adventure mode, a replica of the level ''Yoshi's Island 2'' from the [[Super Mario World (video game)|game of the same name]]. |
||
|} |
|} |
||
| Line 407: | Line 436: | ||
!width="350"|Description |
!width="350"|Description |
||
|- |
|- |
||
| − | |align="center"|[[Target Smash]] |
+ | |align="center"|[[Target Smash#In Super Smash Flash 2|Target Smash]] |
| − | |align="center" |
+ | |align="center"|''{{S|Super Smash Bros.|universe}}'' |
|align="center"|{{Symbol|Super Smash Bros.}} |
|align="center"|{{Symbol|Super Smash Bros.}} |
||
| − | |There are four |
+ | |There are four unique stage layouts that can be played on with any character. |
|- |
|- |
||
|align="center"|[[Home-Run Stadium]] |
|align="center"|[[Home-Run Stadium]] |
||
| − | |align="center" |
+ | |align="center"|''{{S|Super Smash Bros.|universe}}'' |
|align="center"|{{Symbol|Super Smash Bros.}} |
|align="center"|{{Symbol|Super Smash Bros.}} |
||
| − | |The stage used in [[Home-Run Contest]]. |
+ | |The stage used in [[Home-Run Contest]]. It consists of a pedestal and a long stretch of land to the right. It seems to be endless, but it actually loops after a certain point. |
|- |
|- |
||
|align="center"|[[Crystal Smash]] |
|align="center"|[[Crystal Smash]] |
||
| − | |align="center" |
+ | |align="center"|''{{S|Super Smash Bros.|universe}}'' |
| + | |align="center"|{{Symbol|Super Smash Bros.}} |
||
| ⚫ | |||
| + | |- |
||
| + | |align="center"|[[All-Star Rest Area#In Super Smash Flash 2|All-Star Rest Area]] |
||
| + | |align="center"|''{{S|Super Smash Bros.|universe}}'' |
||
|align="center"|{{Symbol|Super Smash Bros.}} |
|align="center"|{{Symbol|Super Smash Bros.}} |
||
| + | |The stage used between each match in [[All-Star#In Super Smash Flash 2|All-Star]]. It consists of a long, flat platform with a slope to the left and three small platforms to the right. |
||
| ⚫ | |||
|- |
|- |
||
|align="center"|[[Tourian]] |
|align="center"|[[Tourian]] |
||
| − | |align="center" |
+ | |align="center"|''{{S|Metroid|universe}}'' |
|align="center"|{{Symbol|Metroid}} |
|align="center"|{{Symbol|Metroid}} |
||
| − | |The stage used in [[Events|event]] #40: ''[[The Mother Brain]]''. |
+ | |The stage used in [[Events|event]] #40: ''[[The Mother Brain]]''. The stage consists of several small platforms with a wall to the right and an area occupied by [[Mother Brain#As a boss|Mother Brain]]. The layout is a recreation of the final battle site from ''{{S|Metroid|video game}}''. |
|} |
|} |
||
Revision as of 01:34, 2 June 2020
- This article is about the areas in the Super Smash Flash series. For the more traditional area with a specific objective, see Level. For other uses, see Stage (disambiguation).
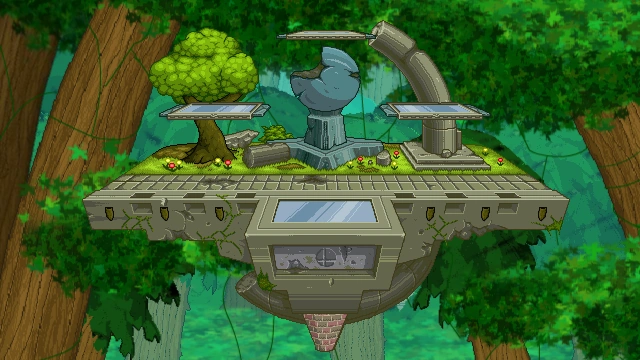
Battlefield is an example of a typical stage in the Super Smash Flash series.
A stage (ステージ) is the designated area where characters fight each other in the Super Smash Flash series. Each stage has a different layout, size and shape, sometimes including hazards that affect the matches in some way, such as lava, water, explosions, etc. The word "stage" usually refers to a Group stage, but can also refer to the ground or large central platform within this location. Some stages, such as those in the various Stadium modes, exist for purposes other than fighting.
Group stages

The stage select in SSF2.
In both Super Smash Flash and Super Smash Flash 2, most of the versus mode stages are available from the start, while a small number must be unlocked by completing certain objectives. Most stages are derived from places in the playable characters' universes, and are typically used as those characters' home stages. There are some stages with no character representatives such as Battlefield and Final Destination. Additionally, not every character has a stage from their own universe.
Stages range in size from the large ones, such as Temple, to the small ones, such as WarioWare, Inc. Typically, stages involve a large central platform with ledges and one or more smaller platforms, as well as blast lines above, below and to the sides of the visible area. Some stages have floors that continue past the edge of the visible area and pass through a side blast line. These floors are known as "walk off edges" or "walk offs", because characters can walk off-screen and die without falling off of an edge first. Stages with walk off edges on both the left and right, like Peach's Castle, are sometimes called "walk off stages".
In SSF2, moving and transforming stages were introduced as this was a technical issue very hard to do in the first SSF. Galaxy Tours and Hylian Skies, for example, are transforming stages that change their own layouts to add new stage possibilities. Most of them possess a default layout known as a "main hub", which the stage returns to after every transformation ends. Notably, Silph Co. is one of the few that does not, instead cycling through twelve different layouts in sequence.
Other stage elements include breakable barriers and platforms, such as the wood planks of Emerald Cave or the sloped floor of Green Hill Zone; stage hazards and enemies, such as lasers; local items such as pellets; and interactive objects such as Barrel Cannons.
An option called the hazard switch, featured in SSF2, allows players to switch off stage hazards and other stage changes.
In Super Smash Flash
Most likely because of limitations, the original Super Smash Flash features only eight versus stages, of which six are starter and two are unlockable (those with shaded cells):
In Super Smash Flash 2
Based on the demo versions, 65 stages are confirmed for Super Smash Flash 2 and will be appearing as starter stages, in addition to unlockable stages. Of these stages, 17 are designated as past stages, which are based on stages from the official Super Smash Bros. series in both name and layout. The currently confirmed stages are as such:
Current stages
Normal stages


Past stages

Disabled stages

|
This section contains information of a formerly confirmed feature.
The original source that confirmed the subject has otherwise become obsolete, outdated or deprecated and has yet to be reconfirmed by an official modern source. |
| Name | Universe | |
|---|---|---|
| Distant Planet | Pikmin | 
|
| Shadow Moses Island | Metal Gear | 
|
| Silph Co. | Pokémon | 
|
| Skyward Voyage | The Legend of Zelda | 
|
Leaked stages

|
This section contains information that has been informally leaked.
The leak happened, either intentionally or by accident, before a formal announcement was made by an official source, so by no mean it should not be taken as a veracious confirmation at all. |
| Name | Universe | |
|---|---|---|
| Butter Building | Kirby | 
|
| Castle Daein | Fire Emblem | 
|
| Ice Climbers | Ice Climber | |
| Skyworld | Kid Icarus | 
|
| Water Temple | The Legend of Zelda |
|
Removed stages

|
This section contains information pertaining to unused content.
The subject was never implemented or was removed, cut or altered at some point of its development, and this section pertains to its original implementation. |
| Name | Universe | |
|---|---|---|
| Castle Wily | Mega Man | 
|
| Temple of Time | The Legend of Zelda |
|
| Test Stage 1 | Super Smash Bros. | 
|
| Test Stage 2 | Super Smash Bros. |
|
In Arena, there is a special rectangular-enclosed stage with goals located on each end of the stage that serves specifically as the setting for Sandbag Soccer. Another similar stage exists as the setting for Sandbag Basketball, but with minor changes and a different background.
Solo stages
In Solo, a number of stages appear that are not available in Group mode. Stages found in Adventure mode are also be referred to as levels.
In Super Smash Flash
| Name | Universe | Description |
|---|---|---|
| Kirby Hub Room | Kirby | The stage used for every characters' Target Test layouts. It consists of many cloud platforms and is used . The target layouts are different for each character and are typically positioned in a way that is tailored towards each character's abilities. |
| Emerald Hill Zone | Sonic | A longer version of the VS. Mode stage of the same name. There are two versions, a horizontally oriented one for Classic, and a more difficult, vertically oriented one for Adventure. |
| Floating Islands | Super Smash Bros. | An infamous level comprised of various platforms that have to be escalated by the player as they avoids swarms of enemies. |
| All-Star Rest Area | Super Smash Bros. | The stage used between each match in All-Star. It consists of a single platform similar to the one used for the top platform in Floating Islands. |
| Super Mario World | Mario | The first level in Adventure mode, a replica of the level Yoshi's Island 2 from the game of the same name. |
In Super Smash Flash 2
| Name | Universe | Description | |
|---|---|---|---|
| Target Smash | Super Smash Bros. |
|
There are four unique stage layouts that can be played on with any character. |
| Home-Run Stadium | Super Smash Bros. |
|
The stage used in Home-Run Contest. It consists of a pedestal and a long stretch of land to the right. It seems to be endless, but it actually loops after a certain point. |
| Crystal Smash | Super Smash Bros. |
|
A stage consisting of a multiple sets of confined platforms. There are four levels with different placements of the crystals, but they all share the same stage layout. |
| All-Star Rest Area | Super Smash Bros. |
|
The stage used between each match in All-Star. It consists of a long, flat platform with a slope to the left and three small platforms to the right. |
| Tourian | Metroid | 
|
The stage used in event #40: The Mother Brain. The stage consists of several small platforms with a wall to the right and an area occupied by Mother Brain. The layout is a recreation of the final battle site from Metroid. |
| |||||||||||||