m (Wait a moment. If guard break isn't a thing when there's no ledge, then how can guard breaks be a thing in SSF?) |
|||
| (18 intermediate revisions by 10 users not shown) | |||
| Line 1: | Line 1: | ||
| + | {{Merge to|Edgeguarding}} |
||
| − | {{Infostub}} |
||
| + | {{Image}} |
||
| ⚫ | A '''guard break''' is a set of techniques in the [[Super Smash Flash |
||
| + | {{Cleanup}} |
||
| ⚫ | A '''guard break''' is a set of techniques in the ''[[Super Smash Flash 2]]'' that counter [[edgeguarding]]. Guard breaking strategies have developed in response to new ways of edgeguarding opponents. However, if a player is allowing their opponent to [[recovering|recover]] (there is no guard) back to the stage, there was no break. If a recovery is not taking place close to a [[ledge]], that is also not considered a break, even if a guard is in place. |
||
== General strategies == |
== General strategies == |
||
=== Spike guard === |
=== Spike guard === |
||
| ⚫ | A character with a powerful [[meteor smash]] will often have their guarding strategy centered around meteor smashing, especially if the character lacks other good guarding strategies, such as {{SSF2|Donkey Kong}}. This guard can be broken by trying to avoid being under the guarder, but certain situations will call for the recovering fighter to use an [[up aerial]]. Dodging to avoid the meteor smash will break the guard, but sometimes mistiming it will have guarded be meteor smashed or leave them in a situation where they are unable to recover. |
||
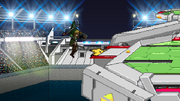
| − | [[File:Edgeguard.png|thumb|{{SSF2|Tails}} performing a spike guard on {{SSF2|Peach}}.]] |
||
| ⚫ | A character with a powerful [[ |
||
=== Grab guard === |
=== Grab guard === |
||
| Line 11: | Line 12: | ||
=== Smash guard === |
=== Smash guard === |
||
| − | The most basic and common guard |
+ | The most basic and common guard is the preparation of a [[smash attack]] upon recovery. It can be broken with an aerial attack, a dodge, or sweet spotting the ledge. This guard is often used to score a [[KO]] at high percentages because of positioning so the break should be executed with care. If attempted at low damage, it is normally intended to be accompanied by another guarding strategy. |
=== Projectile guard === |
=== Projectile guard === |
||
| − | Characters with strong and directed projectiles such as {{SSF2|Link}}, {{SSF2|Zelda}} and {{SSF2|Samus}} can use their projectiles to begin a guard when the opponent is positioned far from the ledge. Zelda's [[Din's Fire]] is hard to break because the direction the projectile goes in can be controlled and has a lot of range. Perfect dodging followed by a strong aerial or carefully sweet spotting the ledge is required to break this guard. This can be performed with items as well |
+ | Characters with strong and directed projectiles such as {{SSF2|Link}}, {{SSF2|Zelda}}, and {{SSF2|Samus}} can use their projectiles to begin a guard when the opponent is positioned far from the ledge. Zelda's [[Din's Fire]] is hard to break because the direction the projectile goes in can be controlled and has a lot of range. Perfect dodging followed by a strong aerial or carefully sweet spotting the ledge is required to break this guard. This can be performed with items as well, using the items themselves as projectiles. |
=== Edge-hogging === |
=== Edge-hogging === |
||
[[File:Edgeguard4.png|thumb|{{SSF2|Pikachu}} edgehogging {{SSF2|Link}}.]] |
[[File:Edgeguard4.png|thumb|{{SSF2|Pikachu}} edgehogging {{SSF2|Link}}.]] |
||
| − | In order the prevent an opponent from grabbing the ledge, players will grab the ledge themselves to prevent the opponent from recovering. The guarder cannot attack the guarded when doing this guard, but most of the time the guarder |
+ | In order the prevent an opponent from grabbing the ledge, players will grab the ledge themselves to prevent the opponent from recovering. The guarder cannot attack the guarded when doing this guard, but most of the time the guarder will not do this until the guarded has done their third jump or the guarder knows that the guarded only possible recovery option is the ledge. The guarded has a few options to break this guard because of the [[invincibility frames]] the guarder receives from grabbing the ledge. The only options left is to use a projectile or perfect time an attack after the invincibility frames are gone. |
=== Off-stage guard === |
=== Off-stage guard === |
||
| − | Off-stage guarding is a risky, but |
+ | Off-stage guarding is a risky, but effective method of edge guarding. The guarder leaves the stage to use a powerful aerial attack to finish the guarded off. The best way to break this guard is to dodge, or hit the guarder first. However, the guarder will normally resort to edgehogging if the off-stage guard fails. Sometimes, the guarded could make it to the ledge and edgehog the guarder. |
== Sacrificial KO "break" == |
== Sacrificial KO "break" == |
||
| − | If a character has a useful Sacrificial KO move it can used to break edge guards. In certain situations the |
+ | If a character has a useful Sacrificial KO move, it can used to break edge guards. In certain situations the recovering fighter will think he/she has no chance of returning to the stage or ledge when a edge guarder is in place. So they will try to drag the guarder down with them. Moves like [[Inhale]] and [[Chomp]] are good examples of this. For obvious reasons, a player should not do this if they have one [[stock]] and/or the opponent has more. |
| ⚫ | |||
| − | |||
| − | == Complex guards and their breaks == |
||
| − | |||
| − | === {{SSF2|Black Mage}} guard === |
||
| − | Black Mage is a great edge guarder with an array of moves at his disposal. He has a strong meteor smash that could become a double meteor smash when sweet spotted, [[Stop]], [[Haste]], [[Meteor]], his uncharged and fully-charged forward smash (that travels a decent distance) and in some situations his dash attack. The options to break his guard depends on what the Black Mage guard does. Black Mage can use his uncharged forward smash to cover the ledge to prevent opponents from sweet spotting it. This can be avoided if the guarded will recover over him or hit him before the hitbox comes out. His fully-charged forward smash covers more vertical range while the horizontal distance traveled covers the entire stage of [[Lunar Core]]. However, the lightning stops for a few seconds before resuming again which can allow players to avoid it easily. The lightning also has fixed height which can allow the guarded to recover over or under it. If the guarded possesses a reflector then they will be able to reflect the lightning back at the guarder thus breaking this guard. Most Black Mage players would use meteor to handle edge guarding. Black Mage players can just send barrages of meteors at the opponent or create a big one to KO the opponent. Black Mage guards will anticipate how the opponent is going to recover, if the opponent tries to recover high then the guard will create a big meteor that will be in the sky or if the opponent tries to sweet spot the ledge then the Black Mage guard will send barrages of meteors. If the opponent possess a reflector then they will be able to reflect the meteors. Opponents who posses a projectile can just aim at Black Mage to stop him from doing this. Opponents who do not possess either of these will have to react to the situation they are put in. Some Black Mage players will use haste on and off the stage depending on where the guarded is positioned. If the guarded air dodges or if the guarded is not in range when Black Mage performs haste in the air, Black Mage will fall into a [[helpless]] state and [[self-destruct]]. However, smart Black Mage players would use the move by the ledge so if they miss the opponent then they could simply grab it and attempt to edge hog. If he uses it on the stage it's best to air dodge, sweet spot the ledge or recover over him. His dash attack does great knockback, posses [[Knockback resistance|super armor]] and has a lasting hitbox. Opponents will have to be careful of how they're going to recover when dealing with this. If the opponent wants to attack the guard then they would have to make sure they hit him before his super armor frames begin. Trying to sweet spot the ledge can be risky due the lasting hitbox of the dash attack outlasting the [[invincibility frames]] gained from grabbing the ledge. The most safest option to avoid this is to recover high. Black Mage players might use Stop (Black Mage can charge it and [[Charge-cancel|save]] the charge) then follow up with meteor, an uncharged forward smash or use his meteor smash. The best way to avoid this is to attack Black Mage before Stop activates, jump over him if possible, air dodge or sweet spot the ledge. Black Mage's off stage guard consists of his forward aerial, his back aerial and his down aerial. His forward and back aerial posses disjointed range so it would best to use a projectile to hit Black Mage, posses a faster aerial or simply air dodge to avoid him. His down aerial meteor smash is effective, but predictable so it would best to recover over him, attack him or air dodge. |
||
| − | |||
| − | === {{SSF2|Mario}} guard === |
||
| − | Mario's guard consists of using [[Cape]], [[Fireball]]s and his quick chain able aerials. Mario's guard mostly revolves around using cape to gimp recovering opponents. Mario can also make use of his fireballs for disrupting recoveries and setting up other guards. Mario can use his aerials in quick succession with each other or go off stage and use his forward aerial meteor smash. Breaking Mario's guard is difficult due to his great edge guarding options and strategies. However, his guard can broken if the guarded is able to recover over Mario. Mario's Fireballs have low priority so they can be canceled out by most moves and they can be reflected. Opponents will try to recover over Mario or try to [[Ledge sweet spot|sweet spot the ledge]] from under if they predict that he is going to use Cape. Like with most of attacks, Mario has short range in his aerials and characters who posses disjointed range or a projectile can handle his offstage guard. This could also put Mario into a bad position. |
||
| − | |||
| − | === {{SSF2|Link}} guard === |
||
| − | Link is an excellent edge guarder thanks to his array of projectiles, strong aerials, the knock back from his [[Spin Attack]], the knockback from his throws and his down tilt meteor smash which he can use to edge guard anyone trying to sweet spot the ledge. Link can use his long reaching grab to catch anyone close to the ledge or in his range and knock them away from the ledge. However, this may not be enough at low percentages and sometimes the guarded can just air dodge his grab, recover above him or try to sweet spot the ledge and use a roll to get back on stage so this breaks his grab guard. Link can use his projectiles to knock opponents away from the ledge to recover, but all of his projectiles can reflected so this breaks his projectile guard. Link could use Spin Attack on the stage or use [[Spin_Attack#Floating_spin_attack|Floating Spin Attack]] to guard opponents off stage. However, to get the full power the move needs to be charged and is easy to avoid. For the on stage Spin Attack the guarded just needs to recover above Link or sweet spot the ledge. For Floating Spin Attack the guarded can just go under link and sweet spot the ledge or try to recover over him thus breaking his Spin Attack guard. Link can use aerials to perform an Off-stage guard to KO the opponent. However, this is risky due to the lag of Link's aerials and his poor recovery would lead him to S.D.ing himself so most Link players wouldn't attempt this. Link can use his meteor smash to keep opponents from trying to grab the ledge, but most opponents would anticipat this action so they would try to attack link or recover above him. |
||
| − | |||
| − | === {{SSF2|Sora}} guard === |
||
| − | Sora's guard consist of [[Thundaga]], [[Strike Raid]], up smash, forward smash, and aerial combo potential. All of these options make Sora a great edgeguarder. Thundaga can be an excellent edgeguarder when the guarded is trying to recover above Sora. However, it has limited range, start up lag and leaves Sora vulnerable to an attack if the guarded air dodges the move or go under the range of the attack and sweet spot the ledge. Strike Raid can be used to push enemies away, can hit twice, can be controlled where the projectile is going and can be canceled. However, the projectile can be reflected back at Sora, air dodged and if Sora mis-reads the guarded movements this will leave himself open to an attack. Sora's up smash can push opponents away. This can work if the guarded is in a helpless state and is trying to recover back to the stage. However, the guarded will most likely anticipat this because the guarder will try to charge the move to get the maximum distance it can push enemies away. The move can be air dodged and won't have any effect if the guarded is out of the moves range. Sora's forward smash is fast and deals good knockback. However, it is easy to predict due to the move needing to be charged to have the desired results. Also the guarded can just recover over Sora, sweet spot the ledge or try to attack Sora before he attacks. Sora has excellent aerial combo potential which he can use to help him with his off-stage edge guarding options. Sora has fast aerials and good range which makes this a edge guarding option for Sora. However, their is a chance the guarded will keep extending the combo and use all of his recovery options that he will not be able to make it back to the stage. The guarded can try to air dodge his combos or try to attack him to break this guard. This guard is very hard to break from for the guarded, but is also very risky for the guarder. |
||
| − | |||
| − | === Wall of pain === |
||
| − | {{Main|Wall of pain}} |
||
| − | This guard can be performed by anyone who has multiple [[midair jump]]s, but is mainly used by {{SSF2|Jigglypuff}} and to a certain extent {{SSF2|Kirby}}. With both Jigglypuff and Kirby it's performed by using their back aerials in quick successions in order to knock the opponent far away from the stage or KO the opponent. It can also be used as a edge guarding technique. Breaking this guard is not difficult, but it is tricky due to Jigglypuff and Kirby's horizontal air speed. However, if timed right there is a possibility to KO the guarded. The guarded has to time the execution of the jumps and back aerials right or they will mess up the move. There is also the possibility that the guarded will use up all their midair jumps and be unable to recover. Air dodging, attacking the guarded, or trying to recover above them is the best or only ways to break this guard. However, breaking this guard is not possible with every character because some characters have horrible horizontal recoveries or don't have one at all. Characters who have good recoveries, strong and fast aerials have the best chances of breaking this guard. |
||
| − | |||
| − | ==={{SSF2|Peach}} guard=== |
||
| − | Peach has an array of techniques that can be used to effectively block a recovering opponent. Her guard consist of using [[Vegetable|Turnips]], [[Peach Bomber]], [[Toad]] (if the opponent's recovery hits Peach), forward smashes and using [[Floating#Auto_Float-cancel|Auto Float-canceling]]. Peach turnips do damage and knockback depending on the face and their is a chance Peach can pull out a [[Bob-omb]] or another item that can deal enough knockback to prevent the guarded from recovering. However, characters who can reflect projectiles can break this guard very easily and characters who get hit, but are close enough to ledge to recover can use this to their advantage. Peach Bomber does decent knockback and last for the duration of Peach's body moving and can be used to help Peach recover horizontally. However, the move has both start up and ending lag, can be air dodged and the guarded can just recover over Peach or under her to sweet spot the ledge (attacking Peach is not wise because Peach Bomber has enough [[Priority]] to cancel out most attacks). Toad has super armor and blows the opponent away when attacked so the guarded has to becareful and try to read the guarded before using their recovery. Peach forward smash has three different forms the Frying Pan (does only vertical knockback), Tennis Racket (which can reflect projectiles and decent knockback) and the Golf Club (which has range and power). However, the guarder never knows which one he/she is going to get and to get the desired results require the smash to be charged. The guarded can anticipat this and try to recover over her, sweet spot the ledge, or attack the guarder. The guarder can use Auto Float-cancel to use Peach's useful aerials to prevent the guarded from recovering to the stage and if used by the ledge after her float time is up she will sweet spot the ledge using this to edge hog. The guarded has to recover over Peach or attack her inorder to break this guard. |
||
| − | |||
| − | ==={{SSF2|Fox}} guard=== |
||
| − | Fox's guard consist of [[Reflector#Shine_spike|shine spiking]], his down throw that can meteor smash opponents when used on the ledge, his down and back aerials. Fox's guard options are limited when compared to other characters, but effective when used properly. Shine spiking works on some characters more then others and is effective in gimping opponents recoveries because it has fixed knockback which means it can used at any percentage on opponents. However, certain characters who possess multiple midair jumps, fast and strong aerials can break this guard by attacking Fox or recovering over him. Fox can use his down throw on his opponents who are trying to recover to the stage and meteor smash them over the ledge with the move. The throw has fixed knockback so no matter how low or high damaged the opponent is they will be sent the same distance regardless so opponents with bad recoveries are more susceptible to this edge guarding option. However, the guarded can just sweet spot the ledge, [[Teching|tech]] the throw if they're able to, [[Directional_Influence#SDI|Smash D.I.]] back on to the stage, attack Fox or recover over him to break this guard. Fox's down aerial meteor smash gives off weak knockback so it's not very useful at low percentages. At high percentages it can gimp most characters and sometimes can lead into a shine spike. However, it is dangerous for a Fox player to use because if they miss the opponent their is a possibility that they might not be able to recover because of Fox's falling speed. The guarded can just air dodge, attack or recover over Fox to break this guard. Fox's back aerial is a strong kick behind him, and unlike in the main ''Super Smash Bros.'' games is not a sex kick, which means that it does not get weaker the longer its out which allows it to keep its power for the duration of the attack. Fox can send most characters far from the stage where they will not be able to recover which can be a problem for characters with poor recoveries. However, this guard can broken if the opponent has disjointed reach which can out-space the back air, a projectile to stop Fox or just recover over Fox. |
||
| − | |||
| − | ===[[Din's Fire]] guard=== |
||
| − | Is a {{SSF2|Zelda}} exclusive guard. A Zelda player will spam Din's Fire to prevent the guarded from returning to the stage. If the guarded was able to make it to the ledge or the stage a skilled Zelda player will have their forward smash, down smash, forward throw, dash attack or any aerial version of [[Lightning Kick]] ready to make sure they are knocked back off. After, this the guarder can just spam Din's Fire all over again. Zelda also has her down tilt and aerial to meteor smash the opponent. Din's Fire can also be controlled where it's going thus making it a good edge guarding option. The options to break this guard is to sweet spot the ledge, attack Zelda with a projectile or attack her if she is near the ledge or use a move that is able to reflect Din's Fire. |
||
| − | |||
| − | ==={{SSF2|Naruto}} guard=== |
||
| − | Naruto's arsenal consists of moves that are perfect for edge guarding. His back, neutral and forward aerials are decent for an off-stage guard. Naruto has [[Shadow Clone Toss]], the aerial version of [[Shadow Clone Summon]], the bushin that is left from [[Shadow Clone Slash]] and [[Rasengan#F.C5.ABton:_Rasenshuriken|Rasenshuirken]] which makes up his projectile guard. His forward and down smashes are useful for smash guarding. His back aerial is a [[sex kick]] which makes it useful for edge guarding in the moves initial frames, but due to it getting weaker the longer its out devalues it usefulness. His neutral aerial is also a sex kick, but its very useful for comboing into other attacks that makes it one of his best edge guarding moves. His forward aerial is meteor smash which makes idea for performing a spike guard. As long as Naruto does not go to far off stage then he will be able to make it back to the stage. However, the problem with Naruto's off stage guard is his short [[reach]] which makes characters with disjointed range or projectiles able to counter this guard while also putting Naruto into a situation where he may not be able to return back to the stage. Naruto's forward smash is a good edge guarding move due to the above average knockback the attack deals. His down smash is good for dealing with opponents who are trying to sweet spot the ledge. However, like with his off stage guarding moves, his smash guard moves have problems with range as well and can become avoided with a good read. Opponents can avoid his forward smash by recovering above him or below him to sweet spot the ledge, opponents who have disjointed reach can handle this by out-[[spacing]] the attack or having a projectile to make Naruto flinch. Opponents can just recover above Naruto if he tries to perform his down smash, like stated above characters with disjointed range or a projectile can deal with this type of guard. His best guarding tactic may be his projectile guard. He can use the bushin from his Shadow Clone Slash to land on the on the ledge to prevent opponents from sweet spotting it. Opponents who come in contact with bushin will suffer [[hitstun]] and will be sent down due to the moves meteor smash properties. However, this can be counter by opponents who recover above the ledge, characters who hit the bushin, but who are above and close enough to the ledge will sweet spot it. The aerial bushin will deal little hitstun and meteor smash the opponent weakly which makes it inferior to its grounded version. Shadow clone toss can be used to get the opponents to come to Naruto which will allow him to follow up with a smash guard or a spike guard. However, opponents who have [[Reflection|reflectors]] will be able to counter this tactic and might possibly reflect the clone so that it will hit Naruto and knock him off stage. Another problem is that if Naruto is successful in having the clone land and have the opponent come to him, but is unable to react in time or the hitstun wears off which will allow the opponent to come back the stage and punish Naruto. The aerial version of Shadow clone summon is useful for knocking opponents away from the stage while the player can just stay on the stage and not have to go off stage. However, characters with reflectors are able to counter this by reflecting clones and Naruto will not be able to use the move for a little bit. Naruto's best edge guarding move is the Rasenshuirken. When the move is activate with an opponent within is his range will become [[Paralysis|paralyzed]] and take the full brunt of the attack. The projectile cannot be reflected or absorbed which makes it an invaluable projectile for edge guarding. The player can throw the projectile at the opponent and read what the opponent is going to do to set up another edge guard or just get near the opponent so they will be unable to move and take the full brunt of the attack. Which makes the latter option even more useful is Naruto's many options he has to combo into the move. |
||
| − | |||
| − | ==={{SSF2|Marth}} guard=== |
||
| − | |||
| − | === {{SSF2|Mega Man}} guard === |
||
[[Category:Techniques]] |
[[Category:Techniques]] |
||
| − | [[Category: |
+ | [[Category:Techniques in Super Smash Flash 2]] |
| ⚫ | |||
| ⚫ | |||
[[Category:Super Smash Flash 2]] |
[[Category:Super Smash Flash 2]] |
||
| ⚫ | |||
Revision as of 18:33, 10 April 2020

|
It has been suggested that this article be merged with.
The editor who added this tag believes this article should be merged with the following: |

|
This article may require some new images.
Whether it is a new image or simply a higher quality update, upload the new file and add it into the article. Remember to always upload an updated file under the same name as the older version to supersede it. |

|
This article is in need of a cleanup.
It has an informal appearance and does not meet the current standards for proper articles. You can help the McLeodGaming Wiki by tidying it up and give it a better presentation. |
A guard break is a set of techniques in the Super Smash Flash 2 that counter edgeguarding. Guard breaking strategies have developed in response to new ways of edgeguarding opponents. However, if a player is allowing their opponent to recover (there is no guard) back to the stage, there was no break. If a recovery is not taking place close to a ledge, that is also not considered a break, even if a guard is in place.
General strategies
Spike guard
A character with a powerful meteor smash will often have their guarding strategy centered around meteor smashing, especially if the character lacks other good guarding strategies, such as Donkey Kong. This guard can be broken by trying to avoid being under the guarder, but certain situations will call for the recovering fighter to use an up aerial. Dodging to avoid the meteor smash will break the guard, but sometimes mistiming it will have guarded be meteor smashed or leave them in a situation where they are unable to recover.
Grab guard
Characters with strong throws or even air throws such as Chomp will try to guard by grabbing the guarded on the approach. This guard can be broken by dodging at a critical time, sweet spotting the ledge, or perfect timing of a forward aerial. However, a grab guard is not restricted to approaching so the grab guard can be continued if both characters are still positioned near the ledge even after a break was successful.
Smash guard
The most basic and common guard is the preparation of a smash attack upon recovery. It can be broken with an aerial attack, a dodge, or sweet spotting the ledge. This guard is often used to score a KO at high percentages because of positioning so the break should be executed with care. If attempted at low damage, it is normally intended to be accompanied by another guarding strategy.
Projectile guard
Characters with strong and directed projectiles such as Link, Zelda, and Samus can use their projectiles to begin a guard when the opponent is positioned far from the ledge. Zelda's Din's Fire is hard to break because the direction the projectile goes in can be controlled and has a lot of range. Perfect dodging followed by a strong aerial or carefully sweet spotting the ledge is required to break this guard. This can be performed with items as well, using the items themselves as projectiles.
Edge-hogging

In order the prevent an opponent from grabbing the ledge, players will grab the ledge themselves to prevent the opponent from recovering. The guarder cannot attack the guarded when doing this guard, but most of the time the guarder will not do this until the guarded has done their third jump or the guarder knows that the guarded only possible recovery option is the ledge. The guarded has a few options to break this guard because of the invincibility frames the guarder receives from grabbing the ledge. The only options left is to use a projectile or perfect time an attack after the invincibility frames are gone.
Off-stage guard
Off-stage guarding is a risky, but effective method of edge guarding. The guarder leaves the stage to use a powerful aerial attack to finish the guarded off. The best way to break this guard is to dodge, or hit the guarder first. However, the guarder will normally resort to edgehogging if the off-stage guard fails. Sometimes, the guarded could make it to the ledge and edgehog the guarder.
Sacrificial KO "break"
If a character has a useful Sacrificial KO move, it can used to break edge guards. In certain situations the recovering fighter will think he/she has no chance of returning to the stage or ledge when a edge guarder is in place. So they will try to drag the guarder down with them. Moves like Inhale and Chomp are good examples of this. For obvious reasons, a player should not do this if they have one stock and/or the opponent has more.