- This article is about the tenth Yeah Jam Fury: U, Me, Everybody! level. For the eighteenth Yeah Jam Fury level, see Dragon (Yeah Jam Fury).
Dragon is the tenth level of Yeah Jam Fury: U, Me, Everybody!. It is one of the twenty levels available at the start of the game.
Overview[]
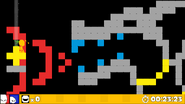
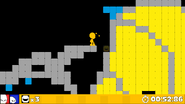
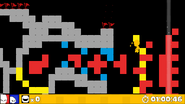
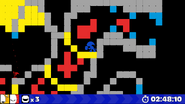
This level takes place on a large collection of blocks in the shape of a long dragon with large wings, a curling spiked tail, clawed feet, and a gaping mouth. While most of the dragon consists of Steel Blocks, Yellow Blocks are present in the wings and tail and where its joints would separate, and Ice Blocks are represent its teeth, claws, and wing spikes.
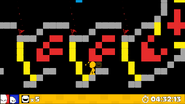
Its main gimmick is the dragon's flame breath, which comes from its mouth in intervals in the form of red squares that strongly push the player back when nearby. These squares come in groups after a set period of time and remain for three seconds before disappearing.
A-Side[]
The A-Side version of this level starts the player in front of the dragon's mouth on top of five Yellow Blocks in a cross shape with three Steel Blocks beneath them in the shape of a grave. The dragon is facing to the left, and there are three sets of flames that start at the opening of its mouth and come in one-second intervals, with each one appearing and reappearing every ten seconds. The mango is located at the end of its tail to the right of the level.
After using Fury to break the five Yellow Blocks, the main method of reaching the mango is to then use Yeah to place them and form a path into the dragon's mouth, where they then may use Fury to break through the sets of Yellow Blocks leading to the main body of the dragon at the bottom. From here, they may reach the top either by reaching the right side of the level and placing their Yellow Blocks to pass over the tail or by using The Bee Sting to pass through the ceiling. Alternatively, the player may simply use the starting five Yellow Blocks to reach the top of the dragon's head and pass over its wings. The mango can then be obtained after coming to the tail.
B-Side[]
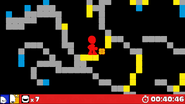
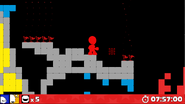
The B-Side version of this level is very similar in design, except not only is it flipped horizontally, but the group of blocks the player starts at is now at the bottom of the level. Additionally, the flames are now bigger, appear twice as quickly, and travel throughout the dragon's body rather than starting at the mouth. There are also now several Fury-Only Flags placed on top of the dragon's head and in front of the gaps on top of its main body.
Like in the A-Side version of the level, the mango can still be obtained by entering the dragon's mouth. However, this is made much harder in that there are more flames to work against and The Bee Sting will cause the player to pass a Fury-Only Flag, making them unable to complete the level. Passing over the dragon now requires the player to place their Yellow Blocks over the Fury-Only Flags to avoid them.
Gallery[]
A-Side[]
B-Side[]
Trivia[]
- This level is a remake of the eighteenth level of the original Yeah Jam Fury. Both levels share the same name and feature a large "dragon" to traverse, but the remade level greatly expands upon the concept.
- This is one of the three levels in the game to have its A-Side version showcased in a video on the official World Entertainment Studios YouTube channel, with the others being Frozen Fruit and Credits.
- The sound effect from the dragon's flames is coincidentally similar to that of the dragon from Adventure, a popular action-adventure game made by Atari for the Atari 2600.
