No edit summary |
Byll (Message Wall | contribs) mNo edit summary |
||
| (47 intermediate revisions by 13 users not shown) | |||
| Line 1: | Line 1: | ||
{{Italic title|Bomberman (''Super Smash Flash 2'')}} |
{{Italic title|Bomberman (''Super Smash Flash 2'')}} |
||
| + | {{Outdated}} |
||
{{About|Bomberman's appearance in ''[[Super Smash Flash 2]]''|general information about the character|Bomberman}} |
{{About|Bomberman's appearance in ''[[Super Smash Flash 2]]''|general information about the character|Bomberman}} |
||
{{Infobox character fighter |
{{Infobox character fighter |
||
| Line 6: | Line 7: | ||
|image = [[File:SSF2 Bomberman.png]] |
|image = [[File:SSF2 Bomberman.png]] |
||
|symbol = {{Symbol|Bomberman}} |
|symbol = {{Symbol|Bomberman}} |
||
| − | |caption = '''Bomberman'''<nowiki>'</nowiki>s official |
+ | |caption = '''Bomberman'''<nowiki>'</nowiki>s official artwork. |
| − | |universe = |
+ | |universe = ''{{S|Bomberman|universe}}'' |
|stock = [[File:SSF2 Bomberman head.png]] |
|stock = [[File:SSF2 Bomberman head.png]] |
||
|availability = [[Starter character|Starter]] |
|availability = [[Starter character|Starter]] |
||
|weight = Medium |
|weight = Medium |
||
| − | |final = [[Revenge]] |
+ | |final = [[Revenge Cart]] |
|tier = B- |
|tier = B- |
||
| − | |ranking = |
+ | |ranking = 23 |
}} |
}} |
||
| − | '''Bomberman''' is a newcomer [[Starter character|starter]] [[character]] in ''[[Super Smash Flash 2]]'' hailing from [[Konami]]'s |
+ | '''Bomberman''' is a newcomer [[Starter character|starter]] [[character]] in ''[[Super Smash Flash 2]]'' hailing from [[Konami]]'s — formerly by the defunct Hudson Soft — {{S|Bomberman|universe|series of the same name}}. His sprites are custom-made and based on his appearance in ''Bomberman Generation'', where he is depicted wearing a red scarf and golden bracelets. |
| − | Bomberman is ranked |
+ | Bomberman is ranked 23rd on the current [[tier list]], a noticeable drop from his 21st place rank on the last tier list. Bomberman has very good stage control due to his ability to plant and move around up to five {{S|bomb|Bomberman}}s on the [[stage]] which, when detonated, produce very large, high-damaging explosions that have to potential to cover the entire stage. He also has very good maneuverability due to his good aerial mobility and a ludicrously fast initial dash that gives him a long [[Dash-dancing|dash-dance]] and can be repeatedly crouch-cancelled to zip around the stage. This is further compounded by his solid air game due to his fast, powerful, disjointed aerials that enable him to combo opponents offstage, as well as his wealth of good kill moves, including his [[smash attack]]s, power bombs, [[back aerial]], and [[forward aerial]], [[up special move]], and [[forward throw]]. |
| − | However, Bomberman suffers from [[Falling speed#Fast-faller|high |
+ | However, Bomberman suffers from a [[Falling speed#Fast-faller|high falling speed]] — the third highest —, and a large hurtbox, that make him susceptible to [[combo]]s and [[chain grab]]s. His recovery, while covering a great vertical distance, is very linear and covers very little horizontal distance, making him easy to gimp. Outside of the moves that use his head, Bomberman's attack range is lackluster, giving him a disadvantage against characters with disjointed [[hitbox]]es, such as {{SSF2|Lloyd}} and {{SSF2|Marth}}. In addition to this, Bomberman becomes considerably weaker onstage if his opponent overwhelms him before he has a chance to set up his bombs. |
Bomberman appears to have a small player base and poor representation in [[online]] [[tournament]]s. However, the players that do participate in tournaments take high spots. |
Bomberman appears to have a small player base and poor representation in [[online]] [[tournament]]s. However, the players that do participate in tournaments take high spots. |
||
| Line 25: | Line 26: | ||
== Attributes == |
== Attributes == |
||
{{See also|Bomberman (Super Smash Flash 2)/Hard data}} |
{{See also|Bomberman (Super Smash Flash 2)/Hard data}} |
||
| + | Bomberman is a character that mainly focuses on stage control, using his bombs to pressure the opponent. |
||
| − | Bomberman has one of the best [[stage control]] games in the demo, due to his ability to drop five [[Bomb (Bomberman)|bombs]] on the field, move them around with [[Bomb Kick]], and [[Bomb Detonate|detonate]] them simultaneously to fill the stage with strong explosions. |
||
| + | As mentioned before, Bomberman's most significant attribute is his ability to place up to five bombs onstage via his [[standard special move]], Bomb. This grants him incredible stage control, which is further supplemented by the ability to charge these bombs for a bigger explosion with more power, and [[Bomb Kick]], which allows Bomberman to move the bombs around the stage. His down special, [[Bomb Detonate]], detonates the bomb(s) he has laid all at once, allowing his to play mindgames with his opponent, or set up ledge traps. |
||
| − | Several of his attacks involve his large head, which gives him good range on his aerials and makes him good at [[juggling]] his opponents. |
||
| + | His ground game is also very potent. His high dash speed allows him to catch up to other characters relatively quickly, granting him the ability to rush down other characters to start or extend combos, or KO. His {{S|standard attack|Super Smash Flash 2}} comes out relatively quickly, and the first two hits can [[Jab reset|lock]], allowing Bomberman to set up for his [[forward smash]] via this method. His [[Up tilt|up]] and [[down tilt]]s are both rather quick, and their low knockback allow them to start or extend combos. Additionally, all his smash attacks boast respectable power, with his forward smash KOing Mario at 65% at Battlefield's edge when fully charged. His aerial game is also very useful, with fast and damaging aerials, with forward aerial notable for being Bomberman's most reliable KO option. |
||
| − | He can travel a significant vertical distance with [[Jetpack]], allowing him to recover from the bottom blast zone on some stages. |
||
| + | Bomberman also sports a solid grab and throw game; despite his grab possessing short range, it is one of the fastest grabs. His up and down throw are both [[chain grab]]s, which can help him set up Bomb kills or rack up damage. His forward and back throws are good at sending opponents far offstage, where they may not be able to recover if not killing them outright. |
||
| − | He can kill with all of his smash attacks, his forward throw, a fully charged bomb, and his forward and up aerials. |
||
| + | However, Bomberman's main weakness is his large head: while it gives him good range in attacks that use it, it also acts as a large [[Hitbox#hurtbox|hurtbox]], making him easier to hit because of this. His high falling speed also compounds this, as he is very susceptible to juggles and combos. Additionally, any attacks that do not use Bomberman's head have lackluster range, leaving him at a disadvantage to characters who possess disjointed [[hitbox]]es (i.e. {{SSF2|Marth}}, {{SSF2|Lloyd}}). His recovery is also very linear, as [[Jetpack]] covers very little horizontal distance in spite of its impressive vertical distance, and it does not decrease his falling speed during startup, letting other characters easily gimp him. |
||
| − | He has a great game and throw game despite his grab possessing short range, but it's one of the fastest grabs. He has two [[chain grab]]s in his up and down throw which can help him set up bomb kills or rack up damage. His forward and back throws are good at sending opponents far offstage, where they may not be able to recover if not killing them outright. |
||
| + | Overall, Bomberman's playstyle relies on his stage control abilities to overwhelm his opponent, though he must be careful when recovering or attacking without caution. |
||
| − | His dash is one of the fastest in the game and he has good air speed, which gives him good mobility. |
||
| − | |||
| − | However, the disadvantage of Bomberman's big head is that it also works as a big hurtbox and combined with his accelerated [[falling speed]], the third fast faller, leads him to being easily combo'ed, juggled, and chain grabbed. |
||
| − | |||
| − | His recovery covers good vertical distance, but lacks in horizontal distance and is extremely telegraphed, giving his opponent plenty of time to intercept him. |
||
| − | |||
| − | He also has some problems in his range which leaves him vulnerable to characters with disjointed hitboxes and with fast, rushdown gameplay. |
||
== Moveset == |
== Moveset == |
||
| Line 47: | Line 42: | ||
{|class="wikitable" |
{|class="wikitable" |
||
!width="100"|Attack |
!width="100"|Attack |
||
| − | !width=" |
+ | !width="center"|Description |
!width="50"|Damage |
!width="50"|Damage |
||
| − | !width="50"|Knockback |
||
| − | !width="50"|Priority |
||
| − | !width="50"|Total frames |
||
| − | !width="50"|Active frames |
||
|- |
|- |
||
| − | |rowspan="3"|[[ |
+ | |rowspan="3"|[[Standard attack]] |
| − | |rowspan="3"| |
+ | |rowspan="3"|A one-two punch followed by a headbutt. |
|align="center"|{{Mousetext|2%|First hit}} |
|align="center"|{{Mousetext|2%|First hit}} |
||
| − | |align="center" rowspan="2"|{{Mousetext|0|Base}}, {{Mousetext|50|Growth}}, {{Mousetext|55°|Angle}} |
||
| − | |align="center" rowspan="3"|1 |
||
| − | |align="center"|7 |
||
| − | |align="center"|2-4 |
||
|- |
|- |
||
|align="center"|{{Mousetext|2%|Second hit}} |
|align="center"|{{Mousetext|2%|Second hit}} |
||
| − | |align="center"|10 |
||
| − | |align="center"|4-6 |
||
|- |
|- |
||
|align="center"|{{Mousetext|5%|Headbutt}} |
|align="center"|{{Mousetext|5%|Headbutt}} |
||
| − | |align="center"|{{Mousetext|56|Base}}, {{Mousetext|60|Growth}}, {{Mousetext|35°|Angle}} |
||
| − | |align="center"|14 |
||
| − | |align="center"|3-6 |
||
|- |
|- |
||
| − | |[[ |
+ | |[[Forward tilt]] |
| − | |Kicks forward with |
+ | |Kicks forward with two legs. |
|align="center"|10% |
|align="center"|10% |
||
| − | |align="center"|{{Mousetext|50|Base}}, {{Mousetext|80|Growth}}, {{Mousetext|46°|Angle}} |
||
| − | |align="center"|3 |
||
| − | |align="center"|17 |
||
| − | |align="center"|5-7 |
||
|- |
|- |
||
| − | |[[ |
+ | |[[Up tilt]] |
|Kicks upward with one foot. |
|Kicks upward with one foot. |
||
|align="center"|7% |
|align="center"|7% |
||
| − | |align="center"|{{Mousetext|40|Base}}, {{Mousetext|130|Growth}}, {{Mousetext|80°|Angle}} |
||
| − | |align="center"|2 |
||
| − | |align="center"|12 |
||
| − | |align="center"|6-7 |
||
|- |
|- |
||
| − | |[[ |
+ | |[[Down tilt]] |
|Sticks his foot out and slides forward. |
|Sticks his foot out and slides forward. |
||
|align="center"|9% |
|align="center"|9% |
||
| − | |align="center"|{{Mousetext|105|Base}}, {{Mousetext|22|Growth}}, {{Mousetext|68°|Angle}} |
||
| − | |align="center"|2 |
||
| − | |align="center"|11 |
||
| − | |align="center"|5-7 |
||
|- |
|- |
||
| − | |[[ |
+ | |[[Dash attack]] |
|Does a falling headbutt. High endlag. |
|Does a falling headbutt. High endlag. |
||
|align="center"|9% |
|align="center"|9% |
||
| − | |align="center"|{{Mousetext|40|Base}}, {{Mousetext|60|Growth}}, {{Mousetext|50°|Angle}} |
||
| − | |align="center"|2 |
||
| − | |align="center"|26 |
||
| − | |align="center"|9-12 |
||
|- |
|- |
||
| − | |[[ |
+ | |[[Forward smash]] |
| − | |Throws a powerful punch. |
+ | |Throws a powerful punch, exploding a bomb at the end. Its high knockback scaling makes it one of the most powerful smash attacks. |
|align="center"|14% |
|align="center"|14% |
||
| − | |align="center"|{{Mousetext|40|Base}}, {{Mousetext|100|Growth}}, {{Mousetext|42°|Angle}} |
||
| − | |align="center"|4 |
||
| − | |align="center"|{{Mousetext|26|+40 frames to fully charge}} |
||
| − | |align="center"|10-11 |
||
|- |
|- |
||
| − | |rowspan="2"|[[ |
+ | |rowspan="2"|[[Up smash]] |
| − | |rowspan="2"|Uppercuts and causes an explosion. Does large knockback. |
+ | |rowspan="2"|Uppercuts and causes an explosion. Does large knockback, though its ground hitboxes are small. |
|align="center"|{{Mousetext|3%|Uppercut}} |
|align="center"|{{Mousetext|3%|Uppercut}} |
||
| − | |align="center"|{{Mousetext|80|Base}}, {{Mousetext|0|Growth}}, {{Mousetext|110°|Angle}} |
||
| − | |align="center" rowspan="2"|5 |
||
| − | |align="center" rowspan="2"|{{Mousetext|29|+40 frames to fully charge}} |
||
| − | |align="center"|7-10 |
||
|- |
|- |
||
|align="center"|{{Mousetext|13%|Explosion}} |
|align="center"|{{Mousetext|13%|Explosion}} |
||
| − | |align="center"|{{Mousetext|70|Base}}, {{Mousetext|75|Growth}}, {{Mousetext|88°|Angle}} |
||
| − | |align="center"|11-15 |
||
|- |
|- |
||
| − | |[[ |
+ | |[[Down smash]] |
|Throws two bombs to the ground while doing a frontflip. |
|Throws two bombs to the ground while doing a frontflip. |
||
|align="center"|13% |
|align="center"|13% |
||
| − | |align="center"|{{Mousetext|84|Base}}, {{Mousetext|75|Growth}}, {{Mousetext|40°|Angle}} |
||
| − | |align="center"|6 |
||
| − | |align="center"|{{Mousetext|23|+40 frames to fully charge}} |
||
| − | |align="center"|9-13 |
||
|} |
|} |
||
| Line 135: | Line 87: | ||
{|class="wikitable" |
{|class="wikitable" |
||
!width="100"|Attack |
!width="100"|Attack |
||
| − | !width=" |
+ | !width="center"|Description |
!width="50"|Damage |
!width="50"|Damage |
||
| − | !width="50"|Knockback |
||
| − | !width="50"|Priority |
||
| − | !width="50"|Total frames |
||
| − | !width="50"|Active frames |
||
|- |
|- |
||
| − | |rowspan="2"|[[ |
+ | |rowspan="2"|[[Neutral aerial]] |
|rowspan="2"|Kicks forward. The early hit sends opponents forward, which can get them off the stage. The late hit is an excellent combo starter and allows for many follow-ups. |
|rowspan="2"|Kicks forward. The early hit sends opponents forward, which can get them off the stage. The late hit is an excellent combo starter and allows for many follow-ups. |
||
|align="center"|{{Mousetext|10%|Sweetspot}} |
|align="center"|{{Mousetext|10%|Sweetspot}} |
||
| − | |align="center"|{{Mousetext|60|Base}}, {{Mousetext|26|Growth}}, {{Mousetext|35°|Angle}} |
||
| − | |align="center" rowspan="2"|3 |
||
| − | |align="center" rowspan="2"|{{Mousetext|15|+5 landing lag}} |
||
| − | |align="center"|4 |
||
|- |
|- |
||
|align="center"|{{Mousetext|7%|Sourspot}} |
|align="center"|{{Mousetext|7%|Sourspot}} |
||
| − | |align="center"|{{Mousetext|56|Base}}, {{Mousetext|26|Growth}}, {{Mousetext|85°|Angle}} |
||
| − | |align="center"|5-10 |
||
|- |
|- |
||
| − | |[[ |
+ | |[[Forward aerial]] |
| − | |Bashes forward with his head. Has excellent diagonal knockback, and excellent horizontal knockback if the opponent is hit |
+ | |Bashes forward with his head. Has excellent diagonal knockback, and excellent horizontal knockback if the opponent is hit with his head. |
|align="center"|12% |
|align="center"|12% |
||
| − | |align="center"|{{Mousetext|55|Base}}, {{Mousetext|95|Growth}}, {{Mousetext|52°|Angle}} |
||
| − | |align="center"|5 |
||
| − | |align="center"|{{Mousetext|16|+4 landing lag}} |
||
| − | |align="center"|5-7 |
||
|- |
|- |
||
| − | |rowspan="2"|[[ |
+ | |rowspan="2"|[[Back aerial]] |
|rowspan="2"|Kicks backwards with both feet. |
|rowspan="2"|Kicks backwards with both feet. |
||
|align="center"|{{Mousetext|8%|Legs}} |
|align="center"|{{Mousetext|8%|Legs}} |
||
| − | |align="center"|{{Mousetext|80|Base}}, {{Mousetext|75|Growth}}, {{Mousetext|140°|Angle}} |
||
| − | |align="center" rowspan="2"|4 |
||
| − | |align="center" rowspan="2"|{{Mousetext|14|+4 landing lag}} |
||
| − | |align="center" rowspan="2"|5-7 |
||
|- |
|- |
||
|align="center"|{{Mousetext|10%|Feet}} |
|align="center"|{{Mousetext|10%|Feet}} |
||
| − | |align="center"|{{Mousetext|45|Base}}, {{Mousetext|75|Growth}}, {{Mousetext|145°|Angle}} |
||
|- |
|- |
||
| − | |[[ |
+ | |[[Up aerial]] |
| − | |Smacks head upward while facing the camera. Excellent for juggling at low or mid percentages, can KO at high percentages. |
+ | |Smacks his head upward while facing the camera. Excellent for juggling at low or mid percentages, can KO at high percentages. |
|align="center"|11% |
|align="center"|11% |
||
| − | |align="center"|{{Mousetext|56|Base}}, {{Mousetext|85|Growth}}, {{Mousetext|82°|Angle}} |
||
| − | |align="center"|4 |
||
| − | |align="center"|{{Mousetext|19|+4 landing lag}} |
||
| − | |align="center"|4-6 |
||
|- |
|- |
||
| − | |rowspan="2"|[[ |
+ | |rowspan="2"|[[Down aerial]] |
|rowspan="2"|Stomps twice in the air. The second hit can lead into aerials at low percentages. |
|rowspan="2"|Stomps twice in the air. The second hit can lead into aerials at low percentages. |
||
|align="center"|{{Mousetext|5%|First hit}} |
|align="center"|{{Mousetext|5%|First hit}} |
||
| − | |align="center"|{{Mousetext|28|Base}}, {{Mousetext|0|Growth}}, {{Mousetext|45°|Angle}} |
||
| − | |align="center" rowspan="2"|3 |
||
| − | |align="center" rowspan="2"|{{Mousetext|16|+4 landing lag}} |
||
| − | |align="center"|5-6 |
||
|- |
|- |
||
|align="center"|{{Mousetext|5%|Second hit}} |
|align="center"|{{Mousetext|5%|Second hit}} |
||
| − | |align="center"|{{Mousetext|90|Base}}, {{Mousetext|58|Growth}}, {{Mousetext|90°|Angle}} |
||
| − | |align="center"|8-9 |
||
|} |
|} |
||
| Line 197: | Line 120: | ||
{|class="wikitable" |
{|class="wikitable" |
||
!width="100"|Attack |
!width="100"|Attack |
||
| − | !width=" |
+ | !width="center"|Description |
!width="50"|Damage |
!width="50"|Damage |
||
| − | !width="50"|Knockback |
||
| − | !width="50"|Priority |
||
| − | !width="50"|Total frames |
||
| − | !width="50"|Active frames |
||
|- |
|- |
||
| + | |[[Grab]] |
||
| − | |[[Bomberman (Super Smash Flash 2)/Grab|Grab]] |
||
|Sticks both arms out. |
|Sticks both arms out. |
||
| − | |{{N/A}} |
+ | |colspan="3" {{N/A}} |
| − | |{{N/A}} |
||
| − | |{{N/A}} |
||
| − | |align="center"|9 |
||
| − | |align="center"|4 |
||
|- |
|- |
||
| − | |[[ |
+ | |[[Pummel]] |
|Headbutts the opponent. |
|Headbutts the opponent. |
||
|align="center"|2% |
|align="center"|2% |
||
| − | |{{N/A}} |
||
| − | |{{N/A}} |
||
| − | |align="center"|7 |
||
| − | |align="center"|5 |
||
|- |
|- |
||
| − | |[[ |
+ | |[[Forward throw]] |
|Throws the opponent forward while falling on his face. High knockback. |
|Throws the opponent forward while falling on his face. High knockback. |
||
|align="center"|10% |
|align="center"|10% |
||
| − | |align="center"|{{Mousetext|55|Base}}, {{Mousetext|110|Growth}}, {{Mousetext|35°|Angle}} |
||
| − | |align="center"|0 |
||
| − | |align="center"|27 |
||
| − | |align="center"|9 |
||
|- |
|- |
||
| − | |[[ |
+ | |[[Back throw]] |
|Spins the opponent around and throws them over his shoulder. |
|Spins the opponent around and throws them over his shoulder. |
||
|align="center"|13% |
|align="center"|13% |
||
| − | |align="center"|{{Mousetext|80|Base}}, {{Mousetext|45|Growth}}, {{Mousetext|160°|Angle}} |
||
| − | |align="center"|0 |
||
| − | |align="center"|31 |
||
| − | |align="center"|20-21 |
||
|- |
|- |
||
| − | |[[ |
+ | |[[Up throw]] |
|Spins the opponent around and throws them diagonally upwards. |
|Spins the opponent around and throws them diagonally upwards. |
||
|align="center"|6% |
|align="center"|6% |
||
| − | |align="center"|{{Mousetext|40|Base}}, {{Mousetext|110|Growth}}, {{Mousetext|70°|Angle}} |
||
| − | |align="center"|0 |
||
| − | |align="center"|17 |
||
| − | |align="center"|12-13 |
||
|- |
|- |
||
| − | |rowspan="2"|[[ |
+ | |rowspan="2"|[[Down throw]] |
| − | | |
+ | |rowspan="2"|Jumps with the opponent, throws them down and finishes with a stomp. Can chain grab fast fallers |
|align="center"|{{Mousetext|5%|Jump}} |
|align="center"|{{Mousetext|5%|Jump}} |
||
| − | |align="center" rowspan="2"|{{Mousetext|65|Base}}, {{Mousetext|45|Growth}}, {{Mousetext|70°|Angle}} |
||
| − | |align="center" rowspan="2"|0 |
||
| − | |align="center" rowspan="2"|29 |
||
| − | |align="center"|14 |
||
|- |
|- |
||
|align="center"|{{Mousetext|7%|Stomp}} |
|align="center"|{{Mousetext|7%|Stomp}} |
||
| − | |align="center"|26 |
||
|} |
|} |
||
=== Other attacks === |
=== Other attacks === |
||
| − | {| |
+ | {|class="wikitable" |
!width="100"|Attack |
!width="100"|Attack |
||
| − | !width=" |
+ | !width="center"|Description |
!width="50"|Damage |
!width="50"|Damage |
||
| − | !width="50"|Knockback |
||
| − | !width="50"|Priority |
||
| − | !width="50"|Total frames |
||
| − | !width="50"|Active frames |
||
|- |
|- |
||
| − | + | |[[Floor attack]] |
|
| − | + | |Does a sweeping roundhouse kick. |
|
| − | |align="center" |
+ | |align="center"|8% |
| − | |align="center" rowspan="2"|{{Mousetext|63|Base}}, {{Mousetext|30|Growth}}, {{Mousetext|25°|Angle}} |
||
| − | |align="center" rowspan="2"|0 |
||
| − | |align="center" rowspan="2"|23 |
||
| − | |align="center"|8-11 |
||
|- |
|- |
||
| + | |[[Ledge attack]] |
||
| − | |align="center"|{{Mousetext|8%|Front}} |
||
| − | |align="center"|18-19 |
||
| − | |- |
||
| − | |[[Bomberman (Super Smash Flash 2)/Ledge attack|Ledge attack]] |
||
|Kicks with both legs while quickly climbing up. |
|Kicks with both legs while quickly climbing up. |
||
|align="center"|13% |
|align="center"|13% |
||
| − | |align="center"|{{Mousetext|85|Base}}, {{Mousetext|28|Growth}}, {{Mousetext|50°|Angle}} |
||
| − | |align="center"|3 |
||
| − | |align="center"|26 |
||
| − | |align="center"|18-19 |
||
|} |
|} |
||
| Line 290: | Line 169: | ||
!width="100"|Attack |
!width="100"|Attack |
||
!width="100"|Name |
!width="100"|Name |
||
| − | !width=" |
+ | !width="center"|Description |
!width="50"|Damage |
!width="50"|Damage |
||
| − | !width="50"|Knockback |
||
| − | !width="50"|Priority |
||
| − | !width="50"|Total frames |
||
| − | !width="50"|Active frames |
||
|- |
|- |
||
| − | |rowspan=" |
+ | |rowspan="3"|[[Standard special move]] |
| − | |rowspan=" |
+ | |rowspan="3"|{{S|Bomb|Bomberman}} |
| − | |rowspan=" |
+ | |rowspan="3"|Pulls out a bomb, which can be charged for greater damage and knockback and thrown in 3 directions — up, down, and forwards —. Bomberman can [[walking|walk]] and [[jumping|jump]] while charging a bomb. He cannot [[running|run]], however. Lastly, bombs have a [[hitbox]] when thrown at someone, which deal the same damage as their explosion hitbox. |
| − | |align="center"|{{Mousetext| |
+ | |align="center"|{{Mousetext|6%|Normal bomb}} |
| − | |rowspan="7" {{N/A}} |
||
| − | |rowspan="7" {{N/A}} |
||
| − | |align="center"|{{Mousetext|999|Bomb will glitch if not thrown by this time}} |
||
| − | |align="center"|{{Mousetext|1|Spawn Bomb}}, {{Mousetext|27|Spawn large bomb}}, {{Mousetext|59|Spawn power bomb}} |
||
|- |
|- |
||
| − | |align="center"|{{Mousetext| |
+ | |align="center"|{{Mousetext|10%|Pumped bomb}} |
| − | |align="center" rowspan="2"|13 |
||
| − | |align="center"|{{Mousetext|5|Throw Bomb}} |
||
|- |
|- |
||
| − | |align="center"|{{Mousetext| |
+ | |align="center"|{{Mousetext|14%|Power bomb}} |
| − | |align="center"|{{Mousetext|6|Throw Bomb}} |
||
| − | |- |
||
| − | |align="center"|{{Mousetext|0%|Throw up}} |
||
| − | |align="center" rowspan="2"|12 |
||
| − | |align="center" rowspan="2"|{{Mousetext|9|Throw Bomb}} |
||
| − | |- |
||
| − | |align="center"|{{Mousetext|0%|Throw up (air)}} |
||
| − | |- |
||
| − | |align="center"|{{Mousetext|0%|Drop Bomb}} |
||
| − | |align="center"|6 |
||
| − | |align="center"|{{Mousetext|5|Drop Bomb}} |
||
| − | |- |
||
| − | |align="center"|{{Mousetext|0%|Drop Bomb (air)}} |
||
| − | |align="center"|10 |
||
| − | |align="center"|{{Mousetext|7|Drop Bomb}} |
||
|- |
|- |
||
| − | |rowspan="2"|[[ |
+ | |rowspan="2"|[[Side special move]] |
|rowspan="2"|[[Bomb Kick]] |
|rowspan="2"|[[Bomb Kick]] |
||
| − | |rowspan="2"|Does a quick kick, which can move bombs around. In the air it can reflect projectiles. |
+ | |rowspan="2"|Does a quick kick, which can move bombs around. In the air, it can reflect projectiles. |
|align="center"|{{Mousetext|5%|Ground}} |
|align="center"|{{Mousetext|5%|Ground}} |
||
| − | |align="center"|{{Mousetext|45|Base}}, {{Mousetext|29|Growth}}, {{Mousetext|20°|Angle}} |
||
| − | |align="center" rowspan="2"|6 |
||
| − | |align="center"|9 |
||
| − | |align="center"|{{Mousetext|2-5|Move bombs on 2}} |
||
|- |
|- |
||
|align="center"|{{Mousetext|5%|Air}} |
|align="center"|{{Mousetext|5%|Air}} |
||
| − | |align="center"|{{Mousetext|98|Base}}, {{Mousetext|35|Growth}}, {{Mousetext|60°|Angle}} |
||
| − | |align="center"|{{Mousetext|18|+6 landing lag}} |
||
| − | |align="center"|{{Mousetext|5-8|Move bombs on 5}} |
||
|- |
|- |
||
| − | |rowspan="3"|[[ |
+ | |rowspan="3"|[[Up special move]] |
|rowspan="3"|[[Jetpack]] |
|rowspan="3"|[[Jetpack]] |
||
|rowspan="3"|Takes out a jetpack that launches him upwards. Good vertical recovery. |
|rowspan="3"|Takes out a jetpack that launches him upwards. Good vertical recovery. |
||
|align="center"|{{Mousetext|7%|Explosion}} |
|align="center"|{{Mousetext|7%|Explosion}} |
||
| − | |align="center"|{{Mousetext|98|Base}}, {{Mousetext|50|Growth}}, {{Mousetext|40°|Angle}} |
||
| − | |align="center"| -1 |
||
| − | |align="center" rowspan="3"|{{Mousetext|40|Edge grab starting at 31}} |
||
| − | |align="center"|13-14 |
||
|- |
|- |
||
|align="center"|{{Mousetext|1%|Rising (per hit, up to 7 times)}} |
|align="center"|{{Mousetext|1%|Rising (per hit, up to 7 times)}} |
||
| − | |align="center"|{{Mousetext|98|Base}}, {{Mousetext|0|Growth}}, {{Mousetext|90°|Angle}} |
||
| − | |align="center" rowspan="2"|2 |
||
| − | |align="center"|15-33 |
||
|- |
|- |
||
|align="center"|{{Mousetext|4%|Final hit}} |
|align="center"|{{Mousetext|4%|Final hit}} |
||
| − | |align="center"|{{Mousetext|90|Base}}, {{Mousetext|80|Growth}}, {{Mousetext|75°|Angle}} |
||
| − | |align="center"|34 |
||
|- |
|- |
||
| − | + | |[[Down special move]] |
|
| − | + | |[[Bomb Detonate]] |
|
| − | + | |Detonates all the bombs he has laid out on the stage. Bigger bombs deal more damage and knockback. |
|
| − | |align="center"|{{Mousetext|0%|Detonation}} |
||
|{{N/A}} |
|{{N/A}} |
||
| − | |{{N/A}} |
||
| − | |align="center"|11 |
||
| − | |align="center"|{{Mousetext|5|Activate detonator}} |
||
|- |
|- |
||
| + | |[[Final Smash]] |
||
| − | |align="center"|{{Mousetext|6%|Bomb}} |
||
| + | |[[Revenge Cart]] |
||
| − | |align="center" rowspan="2"|{{Mousetext|49|Base}}, {{Mousetext|60|Growth}}, {{Mousetext|90°|Angle}} |
||
| − | |align="center"| -1 |
||
| − | |align="center"|7 |
||
| − | |align="center"|1-4 |
||
| − | |- |
||
| − | |align="center"|{{Mousetext|6%|Bomb (thrown)}} |
||
| − | |align="center"|2 |
||
| − | |align="center"|9 |
||
| − | |align="center"|1-5 |
||
| − | |- |
||
| − | |align="center"|{{Mousetext|10%|Large bomb}} |
||
| − | |align="center" rowspan="2"|{{Mousetext|63|Base}}, {{Mousetext|60|Growth}}, {{Mousetext|90°|Angle}} |
||
| − | |align="center"| -1 |
||
| − | |align="center"|7 |
||
| − | |align="center"|1-4 |
||
| − | |- |
||
| − | |align="center"|{{Mousetext|10%|Large bomb (thrown)}} |
||
| − | |align="center"|4 |
||
| − | |align="center"|9 |
||
| − | |align="center"|1-5 |
||
| − | |- |
||
| − | |align="center"|{{Mousetext|14%|Power bomb}} |
||
| − | |align="center" rowspan="2"|{{Mousetext|77|Base}}, {{Mousetext|87|Growth}}, {{Mousetext|90°|Angle}} |
||
| − | |align="center"| -1 |
||
| − | |align="center"|7 |
||
| − | |align="center"|1-4 |
||
| − | |- |
||
| − | |align="center"|{{Mousetext|14%|Power bomb (thrown)}} |
||
| − | |align="center"|5 |
||
| − | |align="center"|9 |
||
| − | |align="center"|1-5 |
||
| − | |- |
||
| − | |[[Bomberman (Super Smash Flash 2)/Final Smash|Final Smash]] |
||
| − | |[[Revenge]] |
||
|Hops on the Bad Bomber and drops countless amounts of bombs toward the stage. |
|Hops on the Bad Bomber and drops countless amounts of bombs toward the stage. |
||
| − | |align="center"| |
+ | |align="center"|Varies |
| − | |{{N/A}} |
||
| − | |{{N/A}} |
||
| − | |{{N/A}} |
||
| − | |{{N/A}} |
||
|} |
|} |
||
=== Misc. === |
=== Misc. === |
||
| − | {| |
+ | {|class="wikitable" |
!width="100"|Misc. |
!width="100"|Misc. |
||
| − | !colspan="3" width="center" |
+ | !colspan="3" width="center"|Description |
|- |
|- |
||
|align="center"|[[On-screen appearance]] |
|align="center"|[[On-screen appearance]] |
||
| Line 425: | Line 222: | ||
|align="center"|Side |
|align="center"|Side |
||
|- |
|- |
||
| − | |align="center"|Down |
+ | |align="center"|Down/Up |
|Spins once and makes the peace sign. |
|Spins once and makes the peace sign. |
||
|- |
|- |
||
| − | |align="center"|[[Idle pose]] |
+ | |align="center"|[[Idling|Idle pose]] |
| − | |colspan="3" |
+ | |colspan="3"|Kicks the ground twice while blinking. |
|- |
|- |
||
|align="center"|[[Victory theme]] |
|align="center"|[[Victory theme]] |
||
| Line 438: | Line 235: | ||
|} |
|} |
||
| − | == |
+ | == Changes and revisions == |
| + | {{Main|Bomberman (Super Smash Flash 2)/Changelog}} |
||
| − | === SSF2 Beta 1.0 === |
||
| + | Bomberman got no changes in [[Super Smash Flash 2 Demo/Beta 1.1|version 1.1]], making him overall worse in the meta, as most other characters got buffed. |
||
| − | *{{Neutral|Gained a new [[Star KO]] and [[Screen KO]] animation.}} |
||
| − | *{{Nerf|[[Falling speed#Accelerated falling speed|Accelerated falling speed]] has been increased. While this helps his vertical endurance this makes him more susceptible to combos.}} |
||
| − | *{{Nerf|Forward smash is weaker.}} |
||
| − | *{{Buff|Forward air appears to be faster.}} |
||
| − | *{{Buff|Forward throw is stronger.}} |
||
| − | *{{Buff|Back throw is stronger.}} |
||
| − | *{{Nerf|Only five Bombs can be on the stage at a time instead of nine.}} |
||
| − | **{{Buff|However, all Bombs can now be charged to a P-Bomb instead of only 3.}} |
||
| − | **{{Buff|Bomberman can now throw Bombs above himself.}} |
||
| − | *{{Buff|Jetpack appears to covers more horizontal distance.}} |
||
| − | **{{Nerf|However, it appears to cover less vertical distance.}} |
||
| − | |||
| − | === SSF2 Beta 1.0.3/1.0.3.1 === |
||
| − | *{{Buff|Adjusted heavy knock back animations}} |
||
| − | *{{Buff|Tumble Fall animation now can grab the ledge}} |
||
| − | *{{Buff|Revised and tweaked hitboxes in most attacks, attackboxes now better cover their animations}} |
||
| − | *{{Neutral|Retimed walk animation}} |
||
| − | *Dash attack: |
||
| − | **{{Buff|Lowered angle (50→30)}} |
||
| − | **{{Buff|Increased knockback scaling (70→80)}} |
||
| − | **{{Buff|Attackboxes now properly cover Bomberman’s motion}} |
||
| − | *Forward tilt: |
||
| − | **{{Nerf|Decreased base knockback (50→25)}} |
||
| − | **{{Buff|Increased knockback scaling (80→100)}} |
||
| − | *Forward smash: |
||
| − | **{{Neutral| Changed visuals: now Bomberman holds a bomb during it}} |
||
| − | **{{Nerf|Reduced base knockback (40→20)}} |
||
| − | *Neutral aerial: |
||
| − | **{{Buff|Clean hit lasts for one more frame}} |
||
| − | **{{Buff|Lowered angle (45→36)}} |
||
| − | **{{Nerf|Reduced base knockback (60→20)}} |
||
| − | **{{Buff|Increased knockback scaling (50→95)}} |
||
| − | *Forward aerial: |
||
| − | **{{Buff|Lowered angle (52→46)}} |
||
| − | **{{Buff|Increased knockback scaling (105→110)}} |
||
| − | *Back aerial: |
||
| − | **{{Nerf|Decreased base knockback (55→40)}} |
||
| − | **{{Buff|Increased knockback scaling (85→90)}} |
||
| − | *Up aerial: |
||
| − | **{{Nerf|Decreased base knockback (56→32)}} |
||
| − | **{{Buff|Increased knockback scaling (85→104)}} |
||
| − | *Standard special move: |
||
| − | **{{Buff|Fixed held Bomb despawning after 33 seconds holding it}} |
||
| − | **{{Buff|Bombs cannot be reflected once they are already on ground}} |
||
| − | **{{Nerf|Bombs do not have hitboxes when thrown anymore}} |
||
| − | **{{Buff|Explosion hitboxes enlarged across the board}} |
||
| − | *Side special move (ground): |
||
| − | **{{Buff|Increased damage (5%→10%)}} |
||
| − | **{{Buff|It is now chargeable by holding down the special button. Charging increases damage and kick distance.}} |
||
| − | *Side special move (aerial): |
||
| − | **{{Buff|Increased hitstun (120%→130%)}} |
||
| − | **{{Buff|Raised angle (60→80)}} |
||
| − | **{{Nerf|Does not give a vertical boost anymore}} |
||
| − | *Back throw: |
||
| − | **{{Nerf|Lowered angle (130→145)}} |
||
| − | *Ledge attack: |
||
| − | **{{Nerf|Reduced damage (13%→6%)}} |
||
| − | |||
| − | === SSF2 Beta 1.0.3.2 === |
||
| − | *{{Neutral|Bomb Kick now has a charging animation}} |
||
== In competitive play == |
== In competitive play == |
||
| Line 505: | Line 243: | ||
=== Notable players === |
=== Notable players === |
||
| + | *''Akabonba'' |
||
=== Tier placement history === |
=== Tier placement history === |
||
== Gallery == |
== Gallery == |
||
| − | === [[ |
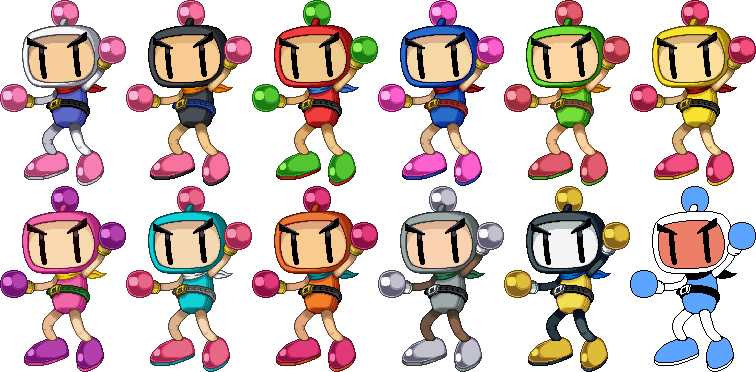
+ | === [[Costume#Bomberman|Costumes]] === |
| + | [[File:SSF2 Bomberman Costumes.png|center|500px]] |
||
| − | {{Image}} |
||
| + | |||
| + | === Artworks === |
||
| + | <gallery> |
||
| + | Bomberman 0.9a.png|Bomberman's first artwork, used in v0.9a. |
||
| + | Bomberman v0.9.png|Bomberman's second artwork, used from v0.9b to Beta 1.1.0.1. |
||
| + | </gallery> |
||
=== Screenshots === |
=== Screenshots === |
||
<gallery> |
<gallery> |
||
BBM Faerial.png|Bomberman using his [[forward aerial]] at {{SSF2|Sandbag}}, on [[World Tournament]]. |
BBM Faerial.png|Bomberman using his [[forward aerial]] at {{SSF2|Sandbag}}, on [[World Tournament]]. |
||
| − | Beta Bomb.png|Bomberman detonating bombs on {{SSF2|Isaac}}, {{SSF2|Zero Suit Samus}}, and {{SSF2|Captain Falcon}} |
+ | Beta Bomb.png|Bomberman detonating bombs on {{SSF2|Isaac}}, {{SSF2|Zero Suit Samus}}, and {{SSF2|Captain Falcon}} on [[Meteo Campaigns]]. |
BBM taunt.jpg|Bomberman [[taunt]]ing. |
BBM taunt.jpg|Bomberman [[taunt]]ing. |
||
| − | + | Bomberman 1.png|Four Bombermans on [[Krazoa Palace]]. |
|
| − | Bomberman 2.png|Bomberman uses Jetpack to reach the [[ledge]] |
+ | Bomberman 2.png|Bomberman uses [[Jetpack]] to reach the [[ledge]] on [[Steel Diver]]. |
| + | Bomberman 3.png|Bomberman and {{SSF2|Kirby}} uses {{S|Bomb|Bomberman}} at {{SSF2|Wario}} on [[Bomb Factory]]. |
||
| + | Ball - Bomberman.png|Ball version. |
||
</gallery> |
</gallery> |
||
| − | + | === Early designs === |
|
<gallery> |
<gallery> |
||
| − | bomberman screen1.png|Bomberman about to use |
+ | bomberman screen1.png|Bomberman about to use Jetpack while two green bombs are about to explode. |
| − | bomberman screen2.png|Bomberman kicking {{SSF2|Mario}} |
+ | bomberman screen2.png|Bomberman kicking {{SSF2|Mario}} on {{SSF2|Battlefield}}. |
| − | bomberman screen3.png|Bomberman launching {{SSF2|Samus}} |
+ | bomberman screen3.png|Bomberman launching {{SSF2|Samus}} on Battlefield with his forward throw. |
| − | bomberman screen4.png|Bomberman holding a Power Bomb while Samus is using her bomb |
+ | bomberman screen4.png|Bomberman holding a Power Bomb while Samus is using her bomb on [[Crateria]]. |
</gallery> |
</gallery> |
||
=== Misc. === |
=== Misc. === |
||
<gallery> |
<gallery> |
||
| − | SSF2 - Classic mode - Bomberman.png|Bomberman's [[congratulations screen]] on [[Classic |
+ | SSF2 - Classic mode - Bomberman.png|Bomberman's [[congratulations screen]] on [[Classic]] mode. |
| + | SSF2 - All-Star mode - Bomberman.png|Bomberman's congratulations screen on [[All-Star]] mode. |
||
</gallery> |
</gallery> |
||
| − | |||
| − | == Trivia == |
||
| − | *Bomberman is the only character so far to have a specific [[palette swap]] for [[Team Battle]]s; he uses a different one from his other costumes for all three teams. |
||
== External link == |
== External link == |
||
Revision as of 06:27, 10 June 2020

|
This article is outdated.
It may contain traces of some old data and statistics and requires an urgent update. You can help the McLeodGaming Wiki by updating it. |
- This article is about Bomberman's appearance in Super Smash Flash 2. For general information about the character, see Bomberman.
Bomberman is a newcomer starter character in Super Smash Flash 2 hailing from Konami's — formerly by the defunct Hudson Soft — series of the same name. His sprites are custom-made and based on his appearance in Bomberman Generation, where he is depicted wearing a red scarf and golden bracelets.
Bomberman is ranked 23rd on the current tier list, a noticeable drop from his 21st place rank on the last tier list. Bomberman has very good stage control due to his ability to plant and move around up to five bombs on the stage which, when detonated, produce very large, high-damaging explosions that have to potential to cover the entire stage. He also has very good maneuverability due to his good aerial mobility and a ludicrously fast initial dash that gives him a long dash-dance and can be repeatedly crouch-cancelled to zip around the stage. This is further compounded by his solid air game due to his fast, powerful, disjointed aerials that enable him to combo opponents offstage, as well as his wealth of good kill moves, including his smash attacks, power bombs, back aerial, and forward aerial, up special move, and forward throw.
However, Bomberman suffers from a high falling speed — the third highest —, and a large hurtbox, that make him susceptible to combos and chain grabs. His recovery, while covering a great vertical distance, is very linear and covers very little horizontal distance, making him easy to gimp. Outside of the moves that use his head, Bomberman's attack range is lackluster, giving him a disadvantage against characters with disjointed hitboxes, such as Lloyd and Marth. In addition to this, Bomberman becomes considerably weaker onstage if his opponent overwhelms him before he has a chance to set up his bombs.
Bomberman appears to have a small player base and poor representation in online tournaments. However, the players that do participate in tournaments take high spots.
Attributes
Bomberman is a character that mainly focuses on stage control, using his bombs to pressure the opponent.
As mentioned before, Bomberman's most significant attribute is his ability to place up to five bombs onstage via his standard special move, Bomb. This grants him incredible stage control, which is further supplemented by the ability to charge these bombs for a bigger explosion with more power, and Bomb Kick, which allows Bomberman to move the bombs around the stage. His down special, Bomb Detonate, detonates the bomb(s) he has laid all at once, allowing his to play mindgames with his opponent, or set up ledge traps.
His ground game is also very potent. His high dash speed allows him to catch up to other characters relatively quickly, granting him the ability to rush down other characters to start or extend combos, or KO. His standard attack comes out relatively quickly, and the first two hits can lock, allowing Bomberman to set up for his forward smash via this method. His up and down tilts are both rather quick, and their low knockback allow them to start or extend combos. Additionally, all his smash attacks boast respectable power, with his forward smash KOing Mario at 65% at Battlefield's edge when fully charged. His aerial game is also very useful, with fast and damaging aerials, with forward aerial notable for being Bomberman's most reliable KO option.
Bomberman also sports a solid grab and throw game; despite his grab possessing short range, it is one of the fastest grabs. His up and down throw are both chain grabs, which can help him set up Bomb kills or rack up damage. His forward and back throws are good at sending opponents far offstage, where they may not be able to recover if not killing them outright.
However, Bomberman's main weakness is his large head: while it gives him good range in attacks that use it, it also acts as a large hurtbox, making him easier to hit because of this. His high falling speed also compounds this, as he is very susceptible to juggles and combos. Additionally, any attacks that do not use Bomberman's head have lackluster range, leaving him at a disadvantage to characters who possess disjointed hitboxes (i.e. Marth, Lloyd). His recovery is also very linear, as Jetpack covers very little horizontal distance in spite of its impressive vertical distance, and it does not decrease his falling speed during startup, letting other characters easily gimp him.
Overall, Bomberman's playstyle relies on his stage control abilities to overwhelm his opponent, though he must be careful when recovering or attacking without caution.
Moveset
Ground attacks
| Attack | Description | Damage |
|---|---|---|
| Standard attack | A one-two punch followed by a headbutt. | 2% |
| 2% | ||
| 5% | ||
| Forward tilt | Kicks forward with two legs. | 10% |
| Up tilt | Kicks upward with one foot. | 7% |
| Down tilt | Sticks his foot out and slides forward. | 9% |
| Dash attack | Does a falling headbutt. High endlag. | 9% |
| Forward smash | Throws a powerful punch, exploding a bomb at the end. Its high knockback scaling makes it one of the most powerful smash attacks. | 14% |
| Up smash | Uppercuts and causes an explosion. Does large knockback, though its ground hitboxes are small. | 3% |
| 13% | ||
| Down smash | Throws two bombs to the ground while doing a frontflip. | 13% |
Aerial attacks
| Attack | Description | Damage |
|---|---|---|
| Neutral aerial | Kicks forward. The early hit sends opponents forward, which can get them off the stage. The late hit is an excellent combo starter and allows for many follow-ups. | 10% |
| 7% | ||
| Forward aerial | Bashes forward with his head. Has excellent diagonal knockback, and excellent horizontal knockback if the opponent is hit with his head. | 12% |
| Back aerial | Kicks backwards with both feet. | 8% |
| 10% | ||
| Up aerial | Smacks his head upward while facing the camera. Excellent for juggling at low or mid percentages, can KO at high percentages. | 11% |
| Down aerial | Stomps twice in the air. The second hit can lead into aerials at low percentages. | 5% |
| 5% |
Grab and throws
| Attack | Description | Damage | ||
|---|---|---|---|---|
| Grab | Sticks both arms out. | N/A | ||
| Pummel | Headbutts the opponent. | 2% | ||
| Forward throw | Throws the opponent forward while falling on his face. High knockback. | 10% | ||
| Back throw | Spins the opponent around and throws them over his shoulder. | 13% | ||
| Up throw | Spins the opponent around and throws them diagonally upwards. | 6% | ||
| Down throw | Jumps with the opponent, throws them down and finishes with a stomp. Can chain grab fast fallers | 5% | ||
| 7% | ||||
Other attacks
| Attack | Description | Damage |
|---|---|---|
| Floor attack | Does a sweeping roundhouse kick. | 8% |
| Ledge attack | Kicks with both legs while quickly climbing up. | 13% |
Special moves
| Attack | Name | Description | Damage |
|---|---|---|---|
| Standard special move | Bomb | Pulls out a bomb, which can be charged for greater damage and knockback and thrown in 3 directions — up, down, and forwards —. Bomberman can walk and jump while charging a bomb. He cannot run, however. Lastly, bombs have a hitbox when thrown at someone, which deal the same damage as their explosion hitbox. | 6% |
| 10% | |||
| 14% | |||
| Side special move | Bomb Kick | Does a quick kick, which can move bombs around. In the air, it can reflect projectiles. | 5% |
| 5% | |||
| Up special move | Jetpack | Takes out a jetpack that launches him upwards. Good vertical recovery. | 7% |
| 1% | |||
| 4% | |||
| Down special move | Bomb Detonate | Detonates all the bombs he has laid out on the stage. Bigger bombs deal more damage and knockback. | N/A |
| Final Smash | Revenge Cart | Hops on the Bad Bomber and drops countless amounts of bombs toward the stage. | Varies |
Misc.
| Misc. | Description | ||
|---|---|---|---|
| On-screen appearance | A small bomb explodes, which he hops out of. | ||
| Taunts | Standard | Jumps and fist pumps. | |
| Side | |||
| Down/Up | Spins once and makes the peace sign. | ||
| Idle pose | Kicks the ground twice while blinking. | ||
| Victory theme | A remix of the flourish that plays at the end of battle mode for the victorious player in Super Bomberman. | ||
| Victory pose | Jumps up and puts his hands on his sides. | ||
Changes and revisions
 Main article: Bomberman (Super Smash Flash 2)/Changelog
Bomberman got no changes in version 1.1, making him overall worse in the meta, as most other characters got buffed.
In competitive play
Match ups
Notable players
- Akabonba
Tier placement history
Gallery
Costumes
Artworks
")
")
Screenshots
")
")
")
")
")
")
")
Early designs
")
")
")
")
Misc.
")
")
External link
| ||||||||
| |||||||||||||||||
